")
Bacon Beer Cheese Stuffing (With Video)
Bacon beer cheese stuffing will kick your side dish game to the next level! Classic stuffing spiked with citrus beer, savory bacon, and cheddar cheese.
When it comes to comforting side dishes, this Bacon Beer Cheese Stuffing hits all the marks. And by marks, I mean the three crucial flavor profiles that simply make any dish better.
First, there’s the bacon. Because, well… bacon. I don’t think I really need to sell you on the deliciousness of bacon, but if I do, just imagine everything amazing about savory meats in the form of a crispy culinary treat. It just makes everything better, and there’s a hefty portion of it in this stuffing.
Then, there’s the beer. Beer has a way of adding a ton of depth to the flavor of a recipe, and especially when used in conjunction with meats like bacon. Even if you’re not a fan of drinking beer you may love it’s when cooked with the right ingredients. I opted to use Blue Moon in this recipe, and the hints of citrus really made the flavor pop.
And, finally, there’s the cheese. I don’t know about you, but I’m always looking for new ways to add cheese to my life, and what better way is there than baking it in a dish that’s 90% French bread?
I certainly can’t think of any!

All fangirl-fawning over the ingredients aside, I must admit that this stuffing recipe surprised me with how good it was. I grew up enjoying the more “traditional” forms of stuffing, which usually meant a lot of bread with a little bit of seasoning. And don’t get me wrong – there’s absolutely nothing wrong with that. Classics are classics for a reason. Stuffing doesn’t have to be a wallop of flavor for it to still be good.
This recipe may be a bit more time-intensive (due to cooking up all that amazing bacon) but since you don’t use the bacon grease in this recipe, you can also opt to use pre-cooked bacon. I know not everyone is a fan, but it can be a great alternative in a pinch. I’ve used pre-cooked bacon in many baked dishes and still loved them just as much.

So if you’re ready to take your side dish game to the next level for your next dinner, holiday, or rainy Sunday, this stuffing is more than worth a walk on the wilder side.
We are talking bacon, beer, and cheese, after all.
How can you go wrong with that?
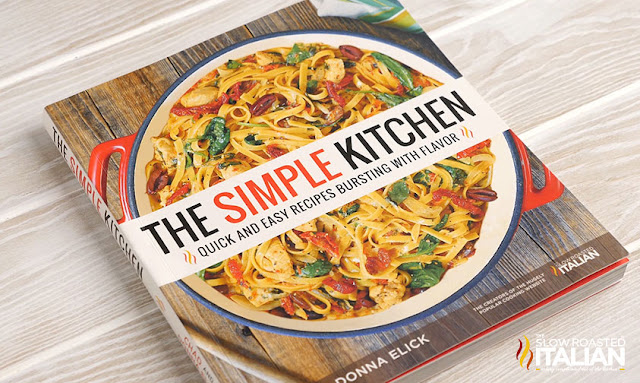
Speaking of simple recipes, of course our new cookbook {The Simple Kitchen - available to order now}is packed with delicious, easy recipes. The Simple Kitchen is loaded with more than 75 BRAND NEW recipes and a hand full of family favorites too.
8 chapters with a total of 82 quick and easy recipes that are bursting with flavor!!! Every recipe has a photo that will make your mouth water. It has slow cooker meals, one-pot recipes, quick dinners, simple appetizers, desserts and more!!! And we have included kitchen tips to make dinnertime less stressful.
8 chapters with a total of 82 quick and easy recipes that are bursting with flavor!!! Every recipe has a photo that will make your mouth water. It has slow cooker meals, one-pot recipes, quick dinners, simple appetizers, desserts and more!!! And we have included kitchen tips to make dinnertime less stressful.
We are so excited to share our recipes with you!!! So, don't wait. Go and grab yours today! The Simple Kitchen <-- click here to order.

Helpful Tips to make Bacon Beer Cheese Stuffing:
What you will need to make Bacon Beer Cheese Stuffing:
- A large skillet with a lid – To help the pasta cook evenly, a wide skillet works best, ideally one that’s more than 12 inches in diameter.
- Mixing Bowls - I like a variety of mixing bowls and prep bowls and this set has them all.
- 9x13 Baking Dish - I have my favorites and this set is one of them. The 9x13 is perfect for casseroles and the smaller size is awesome for making 1/2 a casserole recipe.
Enjoy!
With love from our simple kitchen to yours.
Do you ❤ love ❤ TSRI? Don't miss another recipe. Click here to Subscribe to by Email and receive new recipes in your inbox every day!
 Check out more of our favorite Thanksgiving recipes:
See how easy this Bacon Beer Cheese Stuffing is to make. Watch the video!!!
Yield: 8

Bacon Beer Cheese Stuffing
This bacon beer cheese stuffing will kick your side dish game to the next level! Classic stuffing spiked with citrus beer, savory bacon, and cheddar cheese.
prep time: 15 minscook time: 70 minstotal time: 85 mins
Ingredients
- 3/4 cup butter
- 2 stalks celery, chopped (roughly 1/2 cup)
- 1 large sweet onion, chopped (roughly 1/2 cup)
- 1 pinch salt
- 1 pinch pepper
- 1/2 cup beer (such as Blue Moon)
- 2 large eggs
- 1 teaspoon Worcestershire sauce
- 2 cups low-sodium chicken broth
- 10 cups French bread, cubed, dried out overnight
- 10 slices thick-cut bacon, cooked, drained, and chopped, divided
- 1 cup shredded mild cheddar cheese, divided
- 1 tablespoon fresh thyme, chopped and divided
- 2 teaspoons fresh sage, chopped
Instructions
- Preheat oven to 350 degrees F. Spray a 9x13 baking dish with cooking spray, then set aside.
- Melt butter in a skillet over medium heat. Add celery and onions and season with salt and pepper, to taste. Cook for 6-8 minutes or until veggies are tender. Add beer to skillet and bring to a simmer. Cook for 2-4 minutes, stirring occasionally, or until liquid is reduced by 1/2 and an opaque golden color. Remove skillet from heat.
- In a small bowl, whisk eggs until well beaten, then pour in Worcestershire sauce and chicken broth. Stir until mixed, then set aside.
- In a large mixing bowl, add French bread, 1/2 of the bacon, 1/2 cup mild cheddar, 1/2 tablespoon thyme, and sage, then toss to mix. Pour beer buttery veggies and chicken broth mixture in the bowl and then gently mix until bread is thoroughly saturated.
- Pour stuffing in prepared baking dish and gently smooth into an even layer. Garnish the top of the stuffing with the remaining bacon, mild cheddar, and thyme.
- Cover baking dish with aluminum foil and cook for 40 minutes. Remove foil and bake for another 20-30 minutes or until the top of stuffing is lightly crisp and golden brown.
- Serve Bacon Beer Cheese Stuffing immediately.

")
Disclosure: Posts may contain affiliate links. If you purchase a product through an affiliate link your price will remain the same and will automatically receive a small commission. Thank you for supporting us, it helps us keep creating new recipes. Sumber https://www.theslowroasteditalian.com


")


")


")
")

