Showing posts sorted by date for query baked-french-toast-casserole. Sort by relevance Show all posts

Cranberry Apple Crockpot Oatmeal

Cranberry Apple Crockpot Oatmeal is a simple recipe that is bursting with flavor. Sweet and creamy oatmeal speckled with chunks of apple and cranberry is a new favorite around here. Prep it the night before, then just dump it all in your slow cooker and let it cook while you get ready for the day or cook it overnight if you prefer. It is absolutely amazing and will surely be a family favorite.


I am not a morning person, so as much as I enjoy a hot breakfast and love for Munchkin to have a really great breakfast, I am beyond standing in front of a stove most mornings. Enter the crockpot breakfast. Brilliant!

Oatmeal, pancakes and waffles are our favorite breakfast options around here. My 7-year-old could eat them everyday for the rest of her life and be a happy girl.

As picky as she is about eating, I love to make her a hot breakfast that I can feel good about.  I have been making banana oatmeal for years, prepared in a saucepan, and freezing it for quick and easy breakfasts.

Of course that involves standing over the stove using valuable morning time. So, I started making this crockpot version with some of her favorite fruit, which frees me up from having to stand over the stove. Apples and cranberries are in the tops for favorite fruit.

Needless to say she went crazy over this oatmeal. She devoured 2 bowls and couldn't stop raving about it.

My favorite part was prepping it the night before. Storing in a ziptop bag and dumping it all in the crockpot in the morning and letting cook while I was getting ready for the day. By the time we are ready to eat the oatmeal is perfectly cooked and absolutely amazing.

Cranberry Apple Crockpot Oatmeal is sweet, creamy and bursting with flavor. Prep it the night before, then just dump it all in your crockpot and let it cook while you get ready for the day. It is absolutely amazing and will surely be a family favorite. 


 is a simple recipe that is bursting with flavor Cranberry Apple Crockpot Oatmeal

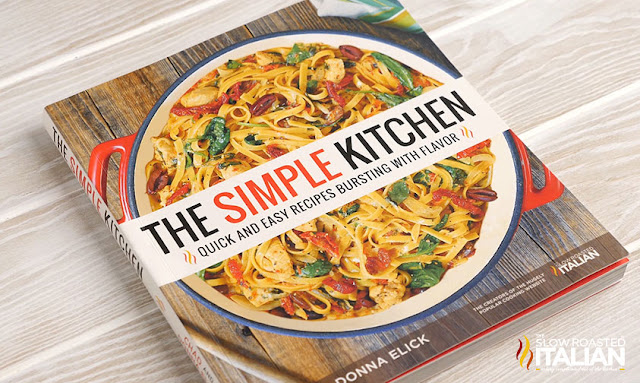
Speaking of simple recipes, of course our new cookbook {The Simple Kitchen - available to order now}is packed with delicious, easy recipes.

The Simple Kitchen is loaded with more than 75 BRAND NEW recipes and a hand full of family favorites too.

8 chapters with a total of 82 quick and easy recipes that are bursting with flavor!!!

Every recipe has a photo that will make your mouth water. It has slow cooker meals, one-pot recipes, quick dinners, simple appetizers, desserts and more!!!

And we have included kitchen tips to make dinnertime less stressful.

We are so excited to share our recipes with you!!! So, don't wait. Go and grab yours today!  The Simple Kitchen <-- click here to order. 

 is a simple recipe that is bursting with flavor Cranberry Apple Crockpot Oatmeal


Helpful Tips to make Cranberry Apple Crockpot Oatmeal:

  • Prepare the night ahead. Add apples, craisins and butter to a zip lock bag. Refrigerate. Combine oats, brown sugar and salt to a separate zip top bag. Set aside. In the morning pour both bags into slow cooker, add water and turn on. 
  • To reheat oatmeal, add a splash of water or milk to a 1 cup of oatmeal and microwave for 1 minute (more as necessary). Overnight cooking method: Follow recipe as listed, cooking on low for 6-8 hours. Oatmeal will be very soft and porrage-like.

    What you will need to make Cranberry Apple Crockpot Oatmeal:

    • Slow Cooker - the slow cooker is almost my most used kitchen appliance, especially during fall/winter! It's just so convenient, and lets face it, it makes comfort food taste even better!
    Enjoy!

    With love from our simple kitchen to yours. 

    Do you  ❤ love ❤ TSRI?  Don't miss another recipe.  Click here to Subscribe to by Email and receive new recipes in your inbox every day!

    Don't miss a thing! Follow us on Facebook | Twitter | Pinterest | Instagram ❤ ❤ ❤  
     is a simple recipe that is bursting with flavor Cranberry Apple Crockpot Oatmeal

    Check out more of our favorite breakfast recipes: 

    Cheesy Sausage Overnight Breakfast Casserole
    Cheesy Bacon and Egg Breakfast Bombs
    Baked French Toast Casserole


    Yield: 4

    Slow Cooker Cranberry Apple Oatmeal

    Cranberry Apple Crockpot Oatmeal is a simple recipe that is bursting with flavor. Sweet and creamy oatmeal speckled with chunks of apple and cranberry is a new favorite around here. Prep it the night before, then just dump it all in your crockpot and let it cook while you get ready for the day or cook it overnight if you prefer. It is absolutely amazing and will surely be a family favorite.
    prep time: 10 MINScook time: 1 hourtotal time: 1 hours and 10 mins

    Ingredients

    • 4    cups water
    • 2    cups old-fashioned oats
    • 2    cups apples, peeled and cut into bite size pieces
    • 1/2  cup craisins
    • 1/8  cup brown sugar
    • 2    tablespoons butter
    • 1/2  teaspoon salt

    Instructions

    1. Prepare your 5 quart slow cooker by spraying slow cooker with non-stick cooking spray. 
    2. Add all ingredients. Stir to combine. Cover and cook on high for 1 hour or low for 1-1/2 - 2 hours.
    3. Serve and enjoy! 

    DONNA'S NOTES

    1. Prepare the night ahead. Add apples, craisins and butter to a zip lock bag. Refrigerate. Combine oats, brown sugar and salt to a separate zip top bag. Set aside. In the morning pour both bags into slow cooker, add water and turn on. 
    2. To reheat oatmeal, add a splash of water or milk to a 1 cup of oatmeal and microwave for 1 minute (more as necessary). Overnight cooking method: Follow recipe as listed, cooking on low for 6-8 hours. Oatmeal will be very soft and porrage-like.


    Disclosure: Posts may contain affiliate links. If you purchase a product through an affiliate link your price will remain the same and will automatically receive a small commission. Thank you for supporting us, it helps us keep creating new recipes.
    Sumber https://www.theslowroasteditalian.com

    Cheesy Sausage Breakfast Pinwheels

    Cheesy Sausage Breakfast Pinwheels are a simple recipe made with soft and tender bread filled with your favorite breakfast fixin's. It's like unrolling a little piece of heaven loaded with smoky bacon, pork sausage, scrambled eggs and ooey gooey cheese!

     are a simple recipe made with soft and tender bread filled with your favorite breakfast f Cheesy Sausage Breakfast Pinwheels

    The best part is you can make them ahead so they are perfect for back to school. Have fun making them with the kids on the weekend. Then heat them up and grab one as they are heading out the door!

    We are so excited to be partnering with our friends at Jones Dairy Farm to bring you a scrumptious breakfast or brunch recipe perfect for the holidays with family and friends, starring one of my favorite ingredients: Jones Dairy Farm All Natural Pork Sausage!!!


    Munchkin is growing up so fast, I can't believe that she is 7! We started this site 6 years ago when she was 1 1/2 and she has been cooking right beside me ever since. With Chad and I so involved in the food world, she follows in our footsteps with a serious interest in cooking and planning out our meals.

    Well, actually at this point she wants to make the recipes not just watch. While we were working on our cookbook (The Simple Kitchen - available for preorder) we came up with the idea for pizza pinwheels. She absolutely loves pizza and I thought that would be a fun way to switch it up. Needless to say, they were a huge hit!


    So, when we were talking about fun breakfast/brinner ideas, we thought a breakfast pinwheel would totally rock our worlds and oh my gosh, we were so right!

    This has to be the most fun that I have ever had working on a recipe. Like I said, Munchkin has been working with me in the kitchen and Chad in photo shoots since she was little, but to get her involved in the process was absolutely so much fun!

    I put together a sweet and tender milk and honey bread dough. Then I rolled it out and Munchkin topped with 2 kinds of cheese, sausage, bacon and eggs and we rolled it up! Then we sliced and baked it. In a snap it was ready to eat, start to finish in an hour!


    Soft and tender milk and honey bread filled with scrambled eggs, bacon, sausage and 2 scrumptious kinds of cheese to add just enough flavor to make this a new favorite!

    Chad has literally been eating these every day for 2 weeks. He swears they remind him of his favorite stuffing in a fabulous breakfast. He can't get enough and I am sure your crew is going to go crazy over them too. Just follow the make-ahead freezing directions and you can make these with the kids on the weekend and enjoy them all week long.


    I will let you all know that you can pick up Jones Dairy Farm products at your local retailer. The company’s products are distributed nationwide, so be sure to check out their product locator to see where you can pick some up. If you’re looking for the breakfast sausage, it’s in the freezer section!
    This bread is super simple, great for a party, and can be prepped ahead of time if you're in a pinch when party planning. It's a great touch on a holiday table as an alternative to traditional rolls.

     are a simple recipe made with soft and tender bread filled with your favorite breakfast f Cheesy Sausage Breakfast Pinwheels

    Speaking of simple recipes, of course our new cookbook {The Simple Kitchen - available to order now}is packed with delicious, easy recipes.

    The Simple Kitchen is loaded with more than 75 BRAND NEW recipes and a hand full of family favorites too.

    8 chapters with a total of 82 quick and easy recipes that are bursting with flavor!!!

    Every recipe has a photo that will make your mouth water. It has slow cooker meals, one-pot recipes, quick dinners, simple appetizers, desserts and more!!!

    And we have included kitchen tips to make dinnertime less stressful.

    We are so excited to share our recipes with you!!! So, don't wait. Go and grab yours today!  The Simple Kitchen <-- click here to order. 

     are a simple recipe made with soft and tender bread filled with your favorite breakfast f Cheesy Sausage Breakfast Pinwheels


    Helpful Tips to make Cheesy Sausage Breakfast Pinwheels:

    • This recipe can be made ahead of time and frozen until ready to enjoy. Cool baked pinwheels in freezer bag. Thaw and bake for 10 minutes at 350°F. 

      What you will need to make Cheesy Sausage Breakfast Pinwheels:

      Enjoy!

      With love from our simple kitchen to yours. 


      Do you  ❤ love ❤ TSRI?  Don't miss another recipe.  Click here to Subscribe to by Email and receive new recipes in your inbox every day!

      Don't miss a thing! Follow us on Facebook | Twitter | Pinterest | Instagram ❤ ❤ ❤  

      Check out more of our favorite breakfast recipes: 

      Fully Loaded Cheesy Breakfast Casserole
      Overnight Baked French Toast Casserole
      Cheesy Sausage and Egg Breakfast Sliders
      Cheesy Bacon and Egg Breakfast Bombs


      Cheesy Sausage Breakfast Pinwheels

      Cheesy Sausage Breakfast Pinwheels are a simple recipe made with soft and tender bread filled with your favorite breakfast fixin's. It's like unrolling a little piece of heaven loaded with smoky bacon, pork sausage, scrambled eggs and ooey gooey cheese! The best part is you can make them ahead so they are perfect for back to school. Have fun making them with the kids on the weekend. Then heat them up and grab one as they are heading out the door!

      Ingredients

      For the Dough
      • 4 1/2 tsp active dry yeast (2 packets)
      • 1 1/4 cups warm milk (110° to 115°)
      • 1/4 cup honey
      • 8 tbsp unsalted butter, melted (divided)
      • 4 cups all-purpose flour
      • 1 1/2 tsp kosher salt
      For the Filling
      • 1/4 cup chopped scallions
      • 4 ounces pepperjack cheese, shredded
      • 6 large eggs, scrambled
      • 1/2 cup Jones Dairy Farm Dry Aged Bacon, cooked and chopped
      • 1 (7 ounce) package Jones Dairy Farm Fully Cooked Sausage links, sliced
      • 4 ounces cheddar cheese, shredded

      Instructions

      1. Preheat oven 350°F.
      2. In the bowl of a stand mixer fitted with a dough hook; add yeast, milk and honey. Swirl with a spoon to dissolve the yeast. Allow the mixture to rest until the yeast becomes foamy and aromatic, about 3 minutes.
      3. Add 3 tablespoons of butter and 3 1/2 cups flour, mix on low until smooth. Add remaining flour to form a soft dough. Add salt. Allow to knead for about 3 minutes. Ball of dough should be slightly sticky.
      4. Meanwhile, grease 9"x13" baking pan with 2 tablespoons remaining melted butter. Set aside.
      5. Turn the dough out onto a lightly floured countertop and form into a ball. Roll the dough out into a 12"x18" wide rectangle. Sprinkle the scallions and pepperjack cheese evenly over the dough leaving a 1" border on the top edge. Lightly press the scallions and cheese into the dough with fingertips or rolling pin.
      6. Add eggs, bacon and sausage in alternating rows over the top. Sprinkle the cheddar cheese evenly over top.
      7. Starting at the long edge, fold the edge of the dough on top of itself and begin tightly rolling the dough away, pinching the ingredients into the roll. Use the last 1” to seal the roll. Cut dough roll in quarters. Cut each of those pieces into 3 pieces for 12 pieces.
      8. Arrange the pinwheels cut side up on the buttered baking sheet, spread them out so they are not touching. Bake 20-25 minutes or until golden brown and cooked through. Brush with remaining 3 tablespoons melted butter.
      9. Serve and enjoy!
      DONNA'S NOTES
      1. This recipe can be made ahead of time and frozen until ready to enjoy. Cool baked pinwheels in freezer bag. Thaw and bake for 10 minutes at 350°F.


      Breakfast is what Jones Dairy Farm does! Can't get enough? Find more scrumptious breakfast and brunch recipes here.


      Disclosure:  This is a sponsored post in partnership with Jones Dairy Farm.  All thoughts and opinions are our own. 

      Disclosure: Posts may contain affiliate links. If you purchase a product through an affiliate link your price will remain the same and will automatically receive a small commission. Thank you for supporting us, it helps us keep creating new recipes.

      Sumber https://www.theslowroasteditalian.com

      Can You Freeze Milk

      Have you ever wondered Can You Freeze Milk? Whether you get a great deal on milk at the store or you hope to stock up to save time, freezing milk is one way of storing it. But, before you simply put the milk container in the freezer, here are a few simple tips to consider. 

        Whether you get a great deal on milk at the store or you hope to stock up to save time Can You Freeze Milk

      How to Freeze Milk

      When it comes to how to freeze milk, don't simply put the container in the freezer. When you freeze it, the milk expands. So, placing the container in the freezer as it can make a huge mess when it comes time to defrost it for use.

       Whether you get a great deal on milk at the store or you hope to stock up to save time Can You Freeze Milk

      Can you freeze milk for later use?

      Yes, you can easily freeze milk to use later on whether it's skim, reduced-fat or whole milk. It is best to freeze your milk before the best by date. It the milk is approaching it's best-by-date you would be better off to use it up in a recipe like our rice pudding or 3-Ingredient Mac and Cheese.

      After you've frozen your milk, to defrost it place it in the refrigerator to thaw. It will be completely safe for consumption if you do that.

      We have frozen milk in the carton, in an ice cube tray and in a freezer-safe plastic container.

       Whether you get a great deal on milk at the store or you hope to stock up to save time Can You Freeze Milk Can you freeze chocolate milk?


      Absolutely! Follow the same directions for regular milk or chocolate milk.

      How long does milk last after being frozen?

      After you have frozen the milk, it will last for three to six months in the freezer. If you try to store it for longer than that, you might find that it has started to absorb odors from the other foods you're freezing (yes, even thru the packaging). And. it may start to look more yellow than normal.

      The reason that frozen milk turns yellow is that the riboflavin doesn't freeze as quickly as the milk. That makes it separate from the milk and causes a color change.

      While this shouldn't affect the taste at all provided you shake it well, it might make it less appealing to people. So, if you're wondering how to freeze milk without it changing color, use it in three to six months.

       Whether you get a great deal on milk at the store or you hope to stock up to save time Can You Freeze Milk

      Can you freeze milk in a carton?

      Yes, you can! However, you will need to open the container of milk and pour out at least an inch of milk. I pour it into a cup and put it in the fridge. Reseal the container and place it in the freezer.

      By removing some of the liquid, you allow it to expand in the carton as it freezes. This will prevent the top from popping off and the milk going over the top. It helps to put the date on the front so you know which container to use first.

      To defrost, place the carton on a plate in the refrigerator overnight. The plate will catch any condensation.

       Whether you get a great deal on milk at the store or you hope to stock up to save time Can You Freeze Milk

      How to freeze milk in ice cube trays

      So, can you freeze milk in ice cube trays? Yes! Simply pour the liquid into an ice cube tray and freeze. When you pour it, be sure that you leave enough room at the top of the container for the contents to expand when it freezes.

      That will make removing it from the ice cube tray easier. After it is completely frozen, remove each cube and place it in a freezer bag. Then, label the freezer bag with today's date.

      The standard ice cube tray holds 1 ounce (2 tablespoons). So if you need 1/4 cup of milk you can just defrost the amount of milk you need.

       Whether you get a great deal on milk at the store or you hope to stock up to save time Can You Freeze Milk

      Can I use other types of containers?

      If you want to, you can use this same method with slightly larger containers. That way, you can freeze it in one cup or two cup measures for recipes that require more liquid.

      That way, when you want to use the milk, you can remove only the amount that you want. This is the perfect method to use if you plan on baking or cooking with it rather than drinking it.

      Ice cube trays are more practical for many people. So, this simple method works well unless you drink a lot of milk each day.

      Milk expands when it freezes so you never want to freeze in a glass container or it will break.

      Does freezing milk change it?

      As long as you use your milk within a few months, you shouldn't see any changes at all. If you freeze it in the carton you may notice the fat separates from the remaining liquid.

      Just shake it well after you defrost it. If you remove it as a cube, just defrost it and add it to whatever recipe you plan on using it in.

      What recipes can I use this in?

      Now that you know how to freeze milk, what should you do with it? You can use it in all of your favorite recipes from fruit smoothies and milkshakes to scrambled eggs. But, if you want a few simple suggestions, you might want to try these recipes:

       Whether you get a great deal on milk at the store or you hope to stock up to save time Can You Freeze Milk

      Speaking of simple recipes, of course our new cookbook {The Simple Kitchen - available to order now}is packed with delicious, easy recipes.

      The Simple Kitchen is loaded with more than 75 BRAND NEW recipes and a hand full of family favorites too.

      8 chapters with a total of 82 quick and easy recipes that are bursting with flavor!!!

      Every recipe has a photo that will make your mouth water. It has slow cooker meals, one-pot recipes, quick dinners, simple appetizers, desserts and more!!!

      And we have included kitchen tips to make dinnertime less stressful.

      We are so excited to share our recipes with you!!! So, don't wait. Go and grab yours today!  The Simple Kitchen <-- click here to order. 

       Whether you get a great deal on milk at the store or you hope to stock up to save time Can You Freeze Milk

      Enjoy!

      With love from our simple kitchen to yours. 

      Do you  ❤ love ❤ TSRI?  Don't miss another recipe.  Click here to Subscribe to by Email and receive new recipes in your inbox every day!

      Don't miss a thing! Follow us on Facebook | Twitter | Pinterest | Instagram ❤ ❤ ❤  

       Whether you get a great deal on milk at the store or you hope to stock up to save time Can You Freeze Milk 


      Author:

       Whether you get a great deal on milk at the store or you hope to stock up to save time Can You Freeze Milk

      How to Freeze Milk

      Have you ever wondered Can You Freeze Milk? Whether you get a great deal on milk at the store or you hope to stock up to save time, freezing milk is one way of storing it. But, before you simply put the milk container in the freezer, here are a few simple tips to consider.


      prep time: 5 Mcook time: 0 Mtotal time: 8H 5 M

      ingredients:

      • milk

      instructions:

      How to Freeze Milk in Small Servings

      1. Pour milk into an ice cube tray. Do not freeze milk when it is near or past its best by date.
      2. Freeze.
      3. Store in a ziptop freezer bag marked with the date. 
      4. Ice cubes will keep in the freezer for 3-6 months. 
      5. To defrost milk cubes, place them in a covered bowl in the refrigerator.
      6. Standard ice cubes are 1-ounce (2 tablespoons). Defrost 8 ice cubes for 1 cup.  
      7. If necessary you can whisk or stir the milk if it is separated when it is defrosted.
      8. Milk is best used in 3-6 months.

      How to Freeze Milk in the Carton

      1. Pour about 1-inch of the milk out of the carton.
      2. Mark today's date on the carton. 
      3. Freeze.
      4. To defrost, place the carton on a plate in the refrigerator overnight. The plate will catch any condensation.
      5. Once the milk is defrosted, make sure the lid is still on tight and then shake the living tar out of it. This will help the smoothness.


      Disclosure: Posts may contain affiliate links. If you purchase a product through an affiliate link your price will remain the same and will automatically receive a small commission. Thank you for supporting us, it helps us keep creating new recipes.

      Sumber https://www.theslowroasteditalian.com

      Cinnabon Cinnamon Rolls Copycat Recipe (VIDEO)

      Cinnabon Cinnamon Roll Copycat Recipe will make you take a second thought, can it really be that good? A sweetened roll with a thick cinnamon-sugar filling and a cream cheese frosting that you are likely to remember long after the cinnamon roll is gone!

      sugar filling and a cream cheese frosting that you are likely to remember long after the c Cinnabon Cinnamon Rolls Copycat Recipe (VIDEO)
      After much back and forth with the family, we have finally decided on Christmas breakfast and this is it! So, we made a video to share it with you.

      I make these the afternoon before Christmas and pop them in the fridge and bake them fresh the next morning. They are our absolute favorite.

      Although there is probably a Cinnabon in every mall and airport across the country, I wasn't introduced to them until I moved to Arizona.  I guess I always thought, "so what...  It's a cinnamon roll".

      Boy, was I wrong.  Shortly after I moved to Arizona my (then) friend Chad and I went to the mall to pick up a few things.  When we walked by the food court he about melted.

      He asked if I want to get a Cinnabon and I said, "Sure... I guess".  He looked at me like I had two heads and said "you guess?"  I explained that I had never had one before.

      That was the last time I would ever reply, "sure...  I guess" when I was offered a Cinnabon Cinnamon Roll.  That's for certain.  Eating a cinnamon roll nearly the size of your head is a whole new experience.

      A soft, sweet roll with thick brown sugar cinnamon filling and the most scrumptious cream cheese frosting you have ever eaten.

      It wasn't long after that day at the mall when Chad and I fell in love.  Was it the cinnamon roll?  Who knows, but it sure didn't hurt!

      20 years later I still remember that first decadent Cinnabon cinnamon roll and the complete and utter feeling of satisfying indulgence; eye's rolling to the back of your head with a chorus of mmmms and aaaahhhhhhs!

      Finally, all these years later I am so excited to have recreated that Cinnabon cinnamon roll in my own home.  A fabulously soft, sweetened bread with made with egg and buttermilk is the base for Cinnabons classic treat, and its also the base for ours.

      We filled ours with butter, cinnamon, brown sugar, and a little corn starch to thicken up the filling (so it doesn't all ooze out, a great tip from a recipe message board).

      The frosting is, of course, the star of the show; a vanilla cream cheese frosting with a hint of lemon to really make it stand out.  It's enough to make your thoughts linger long after you have devoured your first cinnamon roll.

      I am sure we will still get our Cinnabon cinnamon roll at the airport when we travel, as it is tradition.  But I am so excited to be able to enjoy these anytime, without ever having to leave my house.

      Dinner's Breakfast's Ready!

      sugar filling and a cream cheese frosting that you are likely to remember long after the c Cinnabon Cinnamon Rolls Copycat Recipe (VIDEO)

      Speaking of simple recipes, of course our new cookbook {The Simple Kitchen - available to order now}is packed with delicious, easy recipes.

      The Simple Kitchen is loaded with more than 75 BRAND NEW recipes and a hand full of family favorites too.

      8 chapters with a total of 82 quick and easy recipes that are bursting with flavor!!!

      Every recipe has a photo that will make your mouth water. It has slow cooker meals, one-pot recipes, quick dinners, simple appetizers, desserts and more!!!

      And we have included kitchen tips to make dinnertime less stressful.

      We are so excited to share our recipes with you!!! So, don't wait. Go and grab yours today!  The Simple Kitchen <-- click here to order. 

      sugar filling and a cream cheese frosting that you are likely to remember long after the c Cinnabon Cinnamon Rolls Copycat Recipe (VIDEO)

      Helpful Tips to Make Cinnabon Cinnamon Rolls Copycat Recipe:

      • You can mix the dough by hand if you do not have a stand mixer.  Add water, yeast, and sugar to a large bowl.  Once the yeast blooms stir in the buttermilk, eggs, and butter. Mix with a spoon and add the salt and flour. Stir until you can no longer stir with a spoon. .  Turn dough out onto the floured countertop and knead for 3-5 minutes until the dough is no longer sticky.  Proceed with remaining instructions.
      • OVERNIGHT PREPARATION: Prepare cinnamon rolls, once you put them into the baking pans place them in the refrigerator. They will slowly rise overnight. Remove them from the refrigerator in the morning and bake. They may need a few extra minutes to get the chill off in the oven so be sure they are cooked through before you pull them out. Then frost as the recipe describes.

      What you will need to make Cinnabon Cinnamon Rolls Copycat Recipe:


      Enjoy!

      With love from our simple kitchen to yours. 


      Do you  ❤ love ❤ TSRI?  Don't miss another recipe.  Click here to Subscribe to by Email and receive new recipes in your inbox every day!

      Don't miss a thing! Follow us on Facebook | Twitter | Pinterest | Instagram ❤ ❤ ❤

      sugar filling and a cream cheese frosting that you are likely to remember long after the c Cinnabon Cinnamon Rolls Copycat Recipe (VIDEO)


      See how easy this Cinnabon Cinnamon Rolls Copycat Recipe is to make. Watch the video!!!


      Yield: 12

      Cinnabon Cinnamon Rolls Copycat

      Cinnabon Cinnamon Roll Copycat Recipe will make you take a second thought, can it really be that good? A sweetened roll with a thick cinnamon-sugar filling and a cream cheese frosting that you are likely to remember long after the cinnamon roll is gone!

      Ingredients

      Rolls
      • 2 1/4 teaspoons active dry yeast
      • 1 cup water warm (110-120°F)
      • 1/2 cup granulated sugar
      • 1/4 cup buttermilk
      • 2 large eggs
      • 7 tablespoons unsalted butter, divided
      • 5 1/2 - 6 cups all-purpose flour
      • 2 teaspoons kosher salt
      Filling
      • 1/2 cup (1 stick) unsalted butter, softened
      • 1 1/2 cups light brown sugar, packed
      • 2 tablespoons ground cinnamon
      • 1 tablespoon cornstarch
      Frosting
      • 4 ounces cream cheese, softened
      • 1/4 cup (1/2 stick) unsalted butter, softened
      • 1 cups powdered sugar
      • 1/2 tablespoon fresh lemon juice
      • 1 teaspoon vanilla extract
      • 1/2 teaspoon kosher salt

      Instructions

      1. Pour water and sugar into the bowl of a stand mixer fitted with a dough hook (see cooks note if you do not have a stand mixer), sprinkle yeast over top, and stir.  Allow yeast to bloom for 5-10 minutes.  Once it is nice and foamy, it is ready. *It should look like the 'head' of a beer poured too quickly and smell yeasty.
      2. In the meantime:  melt 6 tablespoons of butter in a microwave-safe bowl.
      3. Once the yeast mixture is aromatic and looks like the head of a beer, add buttermilk, eggs, and butter to the bowl of the stand mixer.  Mix on low and add 4 cups of flour, one cup at a time.  Add salt. Once the flour is mixed in, add remaining flour slowly until dough becomes a ball.  Mine takes 5 ½ cups total.  Knead dough on medium-high for 5 minutes.  Add more flour a tablespoon at a time as needed, if bread is too sticky to come together.  The dough should be tacky when you pull it out of the mixer, not sticky.
      4. Lightly dust countertop with flour.  Turn dough out onto the countertop.  Knead a few turns, shape dough into a ball.
      5. Add 1 tablespoon butter to bowl and heat in microwave until melted.  Place dough into bowl upside down, flip the dough over and cover loosely with plastic wrap and drape bowl with a towel.  Set bowl in a warm place in your kitchen.  Allow dough to rise for 60-90 minutes until nearly doubled in size.
      6. Meanwhile combine light brown sugar, cinnamon, and corn starch in a medium bowl.  Stir with a fork until well combined.  Set aside.
      7. Turn dough out onto a lightly floured surface.  Knead the dough a few turns, then using a rolling pin, roll out into an 18” tall x 24” wide rectangle.  Spread softened butter around dough leaving the bottom 1” border uncoated.
      8. Sprinkle the buttered dough with brown sugar mixture, leaving the bottom 1” uncoated.  Use your rolling pin to gently press sugar mixture into the dough (so it doesn't fall out as you roll it).
      9. Starting at the top, tightly roll dough toward you, using the last 1” to seal roll.  Cut dough roll in half and then cut those halves in half, giving you 4 pieces.  Cut each of those pieces into 1/3rd.   You will have 12 pieces.
      10. Grease (2) 9”x13” baking dishes.  Place rolls in pans evenly spaced out, 2 rows of 3 rolls in each.  Make sure to put the end pieces upside down.  Loosely cover with plastic wrap and drape a towel over pans.  Set pans in a warm place and allow rolls to rise another 60-90 minutes until rolls have doubled in size.
      11. Preheat oven 350°F.
      12. Bake for approximately 20 minutes until golden brown and cooked through.  Halfway through baking time rotate the pans.
      13. In the meantime prepare frosting; add cream cheese and butter in a large mixing bowl.  Beat with an electric mixer (or stand mixer) until light and fluffy.  Add remaining ingredients.  Beat until mixture is light and fluffy, about 3-5 minutes.  Set aside.
      14. Remove rolls from oven.  Spread ¼ of frosting over each pan of rolls.  Allow to cool slightly and repeat.  Serve and enjoy!
      DONNA'S NOTES
      1. You can mix the dough by hand if you do not have a stand mixer.  Add water, yeast, and sugar to a large bowl.  Once the yeast blooms stir in the buttermilk, eggs, and butter. Mix with a spoon and add the salt and flour. Stir until you can no longer stir with a spoon. .  Turn dough out onto the floured countertop and knead for 3-5 minutes until the dough is no longer sticky.  Proceed with remaining instructions.
      2. OVERNIGHT PREPARATION: Prepare cinnamon rolls, once you put them into the baking pans place them in the refrigerator. They will slowly rise overnight. Remove them from the refrigerator in the morning and bake. They may need a few extra minutes to get the chill off in the oven so be sure they are cooked through before you pull them out. Then frost as the recipe describes.


      Disclosure: Posts may contain affiliate links. If you purchase a product through an affiliate link your price will remain the same and will automatically receive a small commission. Thank you for supporting us, it helps us keep creating new recipes.
      Sumber https://www.theslowroasteditalian.com

      4-Ingredient Root Beer Quick Bread

      This Root Beer Quick Bread Recipe uses only four ingredients and has a delicious flavor. Root Beer Bread makes a wonderful snack or easy make-ahead breakfast quick bread.

       Recipe uses only four ingredients and has a delicious flavor 4-Ingredient Root Beer Quick Bread

      Root Beer Quick Bread

      This is one of my favorite easy quick bread recipes because it uses only one bowl and four simple ingredients. You can eat it plain or you can top it with this homemade butter.

       Recipe uses only four ingredients and has a delicious flavor 4-Ingredient Root Beer Quick Bread

      What makes a quick bread a quick bread?

      The ingredients in most quick bread recipes are flour, some type of liquid, and a leavening agent. They are called quick because they should be baked immediately after mixing all of the ingredients together.

      One of my favorite things about making this type of bread is that there's no yeast involved. That means no kneading or waiting for it to rise before you bake it.

      It doesn't get much easier than this Root Beer Quick Bread.

      While most of these types of bread are sweet, there are a few savory versions as well.

      This Bacon Cheddar Beer Bread is an example of a savory quick bread recipe.

       Recipe uses only four ingredients and has a delicious flavor 4-Ingredient Root Beer Quick Bread

      What is the best root beer for bread?

      You can use any type of root beer in this Root Beer Bread. A store brand root beer will work just as well as a name brand.

      Keep in mind that this quick bread will take on the taste of whatever type of root beer you use. So, be sure you use your favorite brand.

      How to make Root Beer Quick Bread

      You won't believe how easy this recipe is to make. You simply combine all of the dry ingredients in a bowl. Then, add the rootbeer to a well in the center and mix.

      Then, pour it into a bread pan and drizzle it with melted butter.

      Bake for 30 minutes at 350°F. Remove the quick bread from the oven and drizzle with more butter.

      Then, bake for another 25 to 30 minutes. Allow it to cool for 5 minutes and remove it from the pan. Let it cool completely on a wire rack. Then, enjoy it!

       Recipe uses only four ingredients and has a delicious flavor 4-Ingredient Root Beer Quick Bread

      Recipe notes

      This Root Beer Bread recipe uses self-rising flour. It works with the carbonation in the root beer to rise. But, you can still make this quick bread recipe if you don't have self-rising flour.

      Just substitute all-purpose flour in this root beer bread recipe with a few simple adjustments.

      Self-rising flour is a blend of all-purpose flour, baking soda, and salt.

      So, you can make your own if you are out of self-rising flour. If you plan to use all-purpose flour, you’ll need to add 1 tablespoon of baking soda and 3/4 teaspoon salt.

      Then, use the same cup-for-cup amount of all-purpose in place of the self-rising.

       Recipe uses only four ingredients and has a delicious flavor 4-Ingredient Root Beer Quick Bread

      What if I'm out of root beer?

      Well, you cannot make this Root Beer Quick Bread without rootbeer. But, you can substitute another type of soda in this bread recipe. Why not try lemon-lime, cola, cream soda, or even cherry.

      Each one will have a unique flavor that you are sure to enjoy.

      You can use diet sodas in this recipe as well. It will help cut the sugar and the carbs if you use an option that is lower in sugar.

      Experiment until you find the flavor your family enjoys the most.

       Recipe uses only four ingredients and has a delicious flavor 4-Ingredient Root Beer Quick Bread

      What can I add to this recipe?

      You can add any of your favorite sweet add-ins to this recipe. Try a tablespoon of rolled oats, sesame seeds, or pumpkin seeds. Or, why not try topping the root beer bread with a cinnamon and sugar mix.

      How do you store Root Beer Quick Bread?

      You can store this bread in a sealed plastic bag or airtight container. It should stay good for several days at room temperature stored this way.

      If you want to freeze this bread to enjoy in the future, you can do that as well. Just slice the bread first. Then, separate each slice with parchment paper or wax paper so they don't stick together.

      You can freeze two or three slices in individual freezer bags. Or, freeze the entire loaf (sliced) in a larger container.

      More yeast-free bread recipes

      If you enjoyed this recipe, you might want to try:

      Or, why not try this Root Beer Bread as the basis for your favorite French toast recipe or French toast casserole.

      Equipment

      • 9x5 bread pan - you can use your favorite, just keep in mind that dark pans and glass pans bake hotter so you may want to reduce your oven temperature by 25°F
      • Large bowl - This is my go-to bowl
      • Cooling rack - you can use your removable microwave rack as a cooling rack in a pinch
      • Bread knife - I love a good bread knife. It is one of my essential knives. This one, I have been using for a decade! I also love to slice tomatoes with it.

       Recipe uses only four ingredients and has a delicious flavor 4-Ingredient Root Beer Quick Bread

      Speaking of simple recipes, of course, our new cookbook {The Simple Kitchen - available to order now}is packed with delicious, easy recipes.

      The Simple Kitchen is loaded with more than 75 BRAND NEW recipes and a hand full of family favorites too.

      8 chapters with a total of 82 quick and easy recipes that are bursting with flavor!!!

      Every recipe has a photo that will make your mouth water. It has slow cooker meals, one-pot recipes, quick dinners, simple appetizers, desserts, and more!!!

      And we have included kitchen tips to make dinnertime less stressful.

      We are so excited to share our recipes with you!!! So, don't wait. Go and grab yours today!  The Simple Kitchen <-- click here to order. 

       Recipe uses only four ingredients and has a delicious flavor 4-Ingredient Root Beer Quick Bread

      Enjoy!

      With love from our simple kitchen to yours. 

      Do you  ❤ love ❤ TSRI?  Don't miss another recipe.  Click here to Subscribe to by Email and receive new recipes in your inbox every day!

      Don't miss a thing! Follow us on Facebook | Twitter | Pinterest | Instagram ❤ ❤ ❤  

       Recipe uses only four ingredients and has a delicious flavor 4-Ingredient Root Beer Quick Bread 


      See How Easy it is to Make 4-Ingredient Root Beer Quick Bread. Watch the video!


      Yield: 8
      Author:

       Recipe uses only four ingredients and has a delicious flavor 4-Ingredient Root Beer Quick Bread

      4-Ingredient Root Beer Quick Bread

      This Root Beer Quick Bread Recipe uses only four ingredients and has a delicious flavor. Root Beer Bread makes a wonderful snack or easy make-ahead breakfast quick bread.
      prep time: 5 Mcook time: 10 Mtotal time: 15 M

      ingredients:

      • 3 cups self-rising flour
      • 3 tablespoons granulated sugar
      • 1 (12 ounce) bottle root beer, we used A&W Root Beer
      • 3 tablespoons melted butter, divided

      instructions:

      How to Make 4-Ingredient Root Beer Quick Bread

      1. Preheat oven to 350°F. Prepare a 9"x5" bread pan by greasing with 1 tablespoon of butter. Set aside.
      2. In a large bowl, combine self-rising flour and sugar with a whisk. Make a well in the center. Add the root beer into the well.
      3. Stir the mixture with a spoon until combined.
      4. Pour the mixture into your prepared bread pan. Drizzle with 2 tablespoons of butter. Bake for 55-60 minutes, until browned on top and loaf thumps when you tap the top.
      5. Place on a wire rack and allow to cool for 5 minutes. Remove bread from the pan and allow it to cool on the wire rack. You can brush with more butter if you choose.
      6. Enjoy!
      DONNA'S NOTES*
      1. You can substitute all-purpose flour in this beer bread recipe with a few adjustments. If you plan to use all-purpose flour, you’ll need to use 3 cups of all-purpose flour and add 1 tablespoon of baking soda and 3/4 teaspoon salt.
      2. If you are using unsalted butter, just add 1/4 teaspoon salt to the flour and sugar.
      3. Store loaves in a sealed plastic bag or airtight container. It should stay fresh for a few days at room temperature.
      4. You can also freeze it for later. For best results, slice it first, then place a piece of parchment paper between each slice. This way, you can thaw just what you need. Keep it all in a freezer-safe plastic bag for up to 6 months.


       Recipe uses only four ingredients and has a delicious flavor 4-Ingredient Root Beer Quick Bread

      Disclosure: Posts may contain affiliate links. If you purchase a product through an affiliate link your price will remain the same and will automatically receive a small commission. Thank you for supporting us, it helps us keep creating new recipes.
      Sumber https://www.theslowroasteditalian.com