
How to Make Butter
Learn how to make butter with just two ingredients; it's fun and easy! Plus, you'll have fresh, creamy butter on hand whenever you need it.


Here are a few tips to help you make the perfect batch of creamy, homemade butter.


Disclosure: Posts may contain affiliate links. If you purchase a product through an affiliate link your price will remain the same and will automatically receive a small commission. Thank you for supporting us, it helps us keep creating new recipes. Sumber https://www.theslowroasteditalian.com
The cost to buy dairy products is always changing. But when you have homemade butter in your freezer, you won't need to worry when the prices go up!
It is perfect on our 4-ingredient beer bread.
It is perfect on our 4-ingredient beer bread.
This is a fun food science project for kids, too. It will fascinate them as they watch liquid become a solid, right before their eyes!

Ingredients for homemade butter
This recipe makes about one cup or 8 ounces (2 sticks) of butter. Here are the ingredients you will need:
- 3 cups heavy cream
- 1 teaspoon table salt

Yes, believe it or not, those two simple ingredients are all that you will need!
That being said, a lot of baking recipes call for unsalted butter. If that is what you want, just leave out the salt.
In case you are wondering if there are substitutes for heavy cream in butter, the answer is, no.
You cannot make butter from milk, or from half and half. This is because those dairy products do not have enough fat in them.

Kitchen tools you will need

RECIPE TIPS
Here are a few tips to help you make the perfect batch of creamy, homemade butter.
- Be sure that the heavy cream is very cold. You can even place it into the freezer for 5 to 10 minutes before you start to churn it.
- When it's time to squeeze excess water from the butter, don't be shy. Give it a good, firm squeeze! You want to be sure to remove as much water as possible.
- To prevent a lot of butter from getting between your fingers, hold it between the palms of your hands.

How to make butter
- Pour the cold cream and salt (if you're making salted butter) into your stand mixer.
- Whip the cream at high speed until it separates. *NOTE: The cream will thicken a lot before it begins to separate. This process will take roughly 4 to 5 minutes.
- After it separates, pour the contents through a fine-mesh strainer that is set on top of a large bowl or pitcher. *NOTE: The liquid that strains through is known as buttermilk. However, it is NOT the same as buttermilk that you buy at the store.
To make cultured buttermilk, you will need to add an acid, such as vinegar, lemon, juice, or cultured yogurt to the buttermilk liquid.
Stir it in, then allow the mixture to sit at room temperature for 24 hours. As a result, the acid will curdle and the cultured buttermilk will thicken.
At that point, store it in a covered container in the refrigerator for up to 6 weeks. it can be used to make buttermilk pancakes, muffins, dressing, or anything else that calls for cultured buttermilk. - Rinse the butter with 2 cups of cold water, then squeeze it firmly between the palms of your hands to remove all of the liquid.
The rinsing process is necessary because the water removes any traces of buttermilk that are on the butter. - Place the butter in a bowl, or form it into sticks and wrap them in waxed paper.

HOW TO STORE BUTTER
Store your homemade butter in the refrigerator for up to 6 weeks. Or, place it in a freezer-safe container and freeze it for up to 3 months.
Now that you know how to make butter yourself, the next step is to decide how you want to use it!
Our recommendation? Spread it onto a slice of warm, homemade Amish bread!
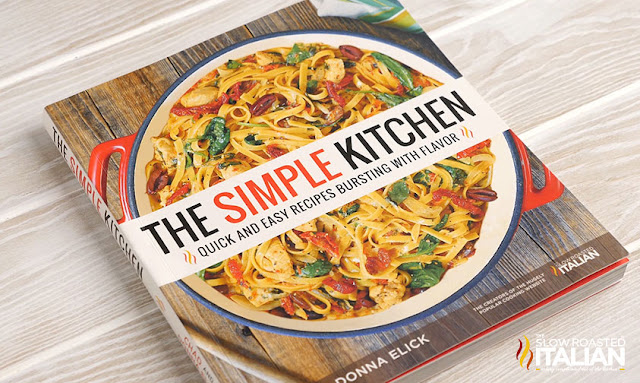
Speaking of simple recipes, of course our new cookbook {The Simple Kitchen - available to order now}is packed with delicious, easy recipes.
The Simple Kitchen is loaded with more than 75 BRAND NEW recipes and a hand full of family favorites too.
8 chapters with a total of 82 quick and easy recipes that are bursting with flavor!!!
Every recipe has a photo that will make your mouth water. It has slow cooker meals, one-pot recipes, quick dinners, simple appetizers, desserts and more!!!
And we have included kitchen tips to make dinnertime less stressful.
We are so excited to share our recipes with you!!! So, don't wait. Go and grab yours today! The Simple Kitchen <-- click here to order.
Enjoy!
With love from our simple kitchen to yours.
Do you ❤ love ❤ TSRI? Don't miss another recipe. Click here to Subscribe to by Email and receive new recipes in your inbox every day!

See How Easy it is to Make Butter. Watch the video!
Yield: 2 Sticks (1 cup)
How to Make Butter
Learn how to make butter with just two ingredients; it's fun and easy! Plus, you'll have fresh, creamy butter on hand whenever you need it.
prep time: 0 Mcook time: 0 Mtotal time: 10 M
ingredients:
- 3 cups cold heavy cream
- 1 teaspoon table salt
instructions:
How to Make Butter
- Pour the cold cream and salt into your stand mixer. You can also use a food processor or an electric whisk.
- Whip the cream until it separates. It will really thicken before it begins to separate. It will take roughly 4 to 5 minutes.
- After it separates, pour the contents through a fine-mesh strainer that is set on top of a large bowl or pitcher. *NOTE
- Rinse the butter with 2 cups cold water, squeeze butter to remove all of the water.
- Place in bowl or form into sticks, by wrapping in wax or parchment paper and store in the refrigerator for up to 6 weeks.
DONNA'S NOTES
- The liquid that strains through is known as buttermilk. However, it is NOT the same as buttermilk that you buy at the store.
To make cultured buttermilk, you will need to add an acid, such as vinegar, lemon, juice, or cultured yogurt to the buttermilk liquid. I would use about a tablespoon
Stir it in, then allow the mixture to sit at room temperature for 24 hours. As a result, the acid will curdle and the cultured buttermilk will thicken.
At that point, store it in a covered container in the refrigerator for up to 6 weeks. it can be used to make buttermilk pancakes, muffins, dressing, or anything else that calls for cultured buttermilk.
Disclosure: Posts may contain affiliate links. If you purchase a product through an affiliate link your price will remain the same and will automatically receive a small commission. Thank you for supporting us, it helps us keep creating new recipes.


