
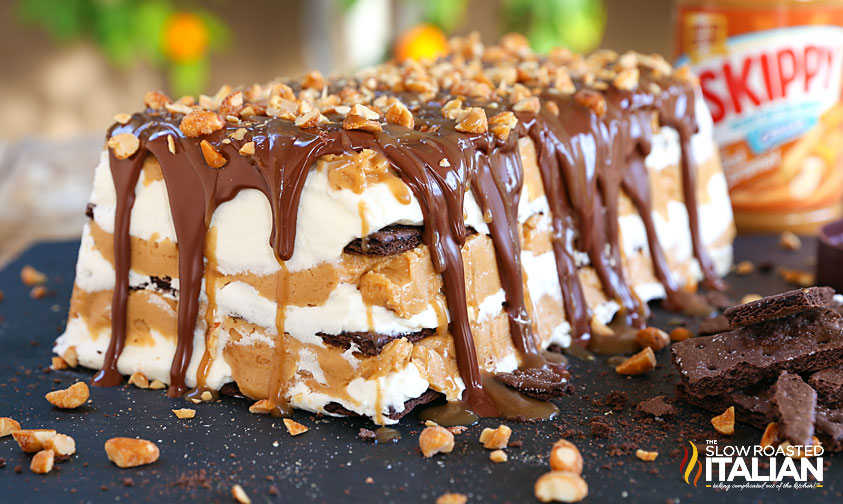
Peanut Butter Caramel No-Bake Icebox Cake
This no-bake cake starts with a flavor explosion of peanut butter, caramel and chocolate. What could possibly be better? How about a simple recipe with mind blowing results? This fabulous cake is stacked with layer upon layer of sweet and salty creamy peanut butter filling, cream and chocolate cookies. After a trip to the fridge the layers become this incredibly moist and creamy cake... all without ever turning the oven on.
Now if you will excuse me, I need to take a moment to collect my thoughts (and be alone with the last piece of this divine dessert).
My family has been eating Skippy Peanut Butter as long as I can remember. We are a peanut butter household. Whether is it a simple pb&j sandwich, an apple and peanut butter snack, Extreme Peanut Butter Fudge Brownies that leave this house by the truckload or just a spoonful for the heck of it, we ❤ our Skippy. Truth be told I have a really great supply of Skippy on hand at all times. You know, back ups in case we run out and then we have back ups for our back ups just to be sure. LOL

This simple recipe is no-bake and only takes a handful of ingredients. Chill it for a few hours or overnight. We like to store it in the freezer and it is the perfect make ahead dessert. Scrumptious and wholly impressive.
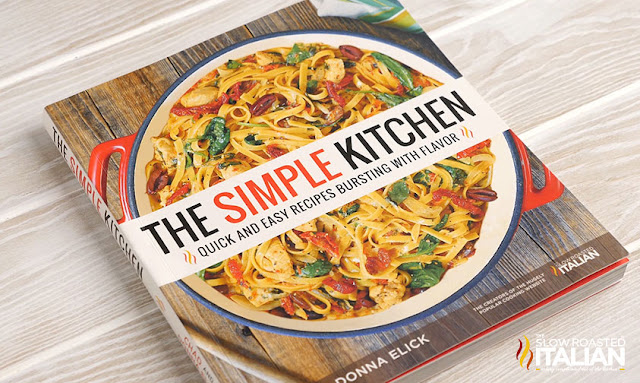
Speaking of simple recipes, of course our new cookbook {The Simple Kitchen - available to order now}is packed with delicious, easy recipes.
The Simple Kitchen is loaded with more than 75 BRAND NEW recipes and a hand full of family favorites too.
8 chapters with a total of 82 quick and easy recipes that are bursting with flavor!!!
Every recipe has a photo that will make your mouth water. It has slow cooker meals, one-pot recipes, quick dinners, simple appetizers, desserts and more!!!
And we have included kitchen tips to make dinnertime less stressful.
We are so excited to share our recipes with you!!! So, don't wait. Go and grab yours today! The Simple Kitchen <-- click here to order.

Helpful Tips to make Peanut Butter Caramel No-Bake Ice Box Cake:
What you will need to make Peanut Butter Caramel No-Bake Ice Box Cake:
- Mixing Bowl- I like a variety of mixing bowls and prep bowls and this set has them all.
- 9x5 Baking Dish-
Enjoy!
With love from our simple kitchen to yours.
Do you ❤ love ❤ TSRI? Don't miss another recipe. Click here to Subscribe to by Email and receive new recipes in your inbox every day!
Check out more of our favorite no-bake recipes:
Strawberry Shortcake No-Bake Icebox Cake
The Extreme Reese's Peanut Butter No-Bake Pie
No-Bake Avalanche Cookies
Lucky Charms No-Bake Pie
Lemon Cloud No-Bake Icebox Cake
The Extreme Reese's Peanut Butter No-Bake Pie
No-Bake Avalanche Cookies
Lucky Charms No-Bake Pie
Lemon Cloud No-Bake Icebox Cake
Yield: 12

Peanut Butter Caramel No-Bake Ice Box Cake
This no-bake cake starts with a flavor explosion of peanut butter, caramel and chocolate. What could possibly be better? How about a simple recipe with mind blowing results? This fabulous cake is stacked with layer upon layer of creamy peanut butter filling, cream and chocolate cookies. After a trip to the fridge the layers become this incredibly moist and creamy cake... all without ever turning the oven on.
prep time: 25 minscook time: total time: 25 mins
Ingredients
- 2 cups heavy whipping cream
- 1 3/4 cups powdered sugar, divided
- 1 teaspoon pure vanilla extract
- 8 ounces cream cheese, softened
- 1 (15 ounce) jar creamy peanut butter
- 10-15 chocolate graham crackers
- 4 ounces chocolate shell ice cream topping (check out our homemade version here)
- 2 tablespoons caramel topping
- 1/4 cup honey roasted peanuts, chopped
Instructions
- In a tall bowl whip heavy cream with an electric mixer until you can start to see a defined trail through the cream. Add vanilla and slowly add 3/4 cup powdered sugar. Whip until stiff peaks form. (In other words when you turn off the blender and lift the beaters out of the cream, the cream stand up on the end of the beater). Place in the refrigerator while you prepare the remaining ingredients.
- To prepare the filling: Combine cream cheese, peanut butter and 1 cup powdered sugar in a large mixing bowl. Beat with an electric mixer until light and fluffy (about 3 minutes). Fold in 1/2 of the whipped cream until it is completely incorporated. Set aside.
- Line a 9 x 5-inch baking dish with parchment paper or plastic wrap. Layer 1/3 of the peanut butter cream on the bottom of the pan. Smooth into an even layer. Add 1/3 of whipped cream on top of the peanut butter cream and use spatula to smooth into an even layer. Top with a layer of graham crackers, breaking them if necessary to make them fit.
- Repeat the layers 2 more times, ending with graham crackers. They will slightly peek over your baking dish.
- Cover and refrigerate 3-4 hours or freeze for 1-2 hours.
- Remove cake from refrigerator or freezer, invert pan onto a plate. Pour chocolate shell topping onto cake (starting at one end and working to the other). While you are pouring, use an offset spatula to smooth and help the chocolate drip down the sides. Keep in mind the chocolate will harden so you must work fast.
- Drizzle the chocolate top with caramel and sprinkle with chopped peanuts.
- Refrigerate until ready to serve or serve immediately.
- Enjoy!
Originally published 2/20/15
Disclosure: Posts may contain affiliate links. If you purchase a product through an affiliate link your price will remain the same and will automatically receive a small commission. Thank you for supporting us, it helps us keep creating new recipes. Sumber https://www.theslowroasteditalian.com


