
Bacon Cheddar Beer Bread
Bacon Cheddar Beer Bread is a simple no-knead recipe that is mixed with a spoon and ready to go in the oven before it is done preheating! Loaded with cheese and bacon this is a winner!
I have been playing with some bread recipes lately and have fallen in love with the simplicity of beer bread. They are a bit more dense, but can be mixed with a spoon, there is no kneading and no rise time. That is a perfect option for times when you don't have 3 hours to make bread.
My first few loaves I made with a more flavorful beer and then used a light beer. I can tell you there was a difference. I would stick with a more flavorful beer. You can't taste the beer, but you get a nice flavor to the bread that could best be described as sourdough-esque. In fact the loaf has that firm textured crust and softer bread like sourdough as well.
After making a few recipes of a basic beer bread, I tried a few variations. The recipe I am sharing with you today is fantastic!!! Bacon and cheese in beer bread... OH MY!!! Munchkin swiped a slice and devoured it. She kept saying "Mmmmm" as she was eating it. It really is so good and so easy. Prep is in no time. Set oven to preheat and by the time it beeps you will be sliding your loaf in the oven. It's that fast!
I have made this recipe dozens of times and it is always a home run. Perfect for sandwiches, grilled cheese, french toast and more. How are you using your beer bread. I would love some more suggestions.
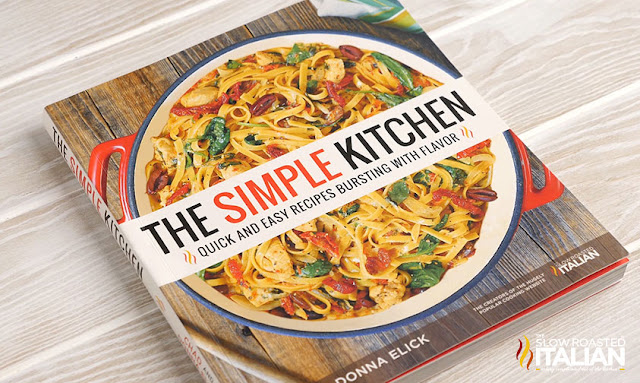
Speaking of simple recipes, of course our new cookbook {The Simple Kitchen - available to order now}is packed with delicious, easy recipes.
The Simple Kitchen is loaded with more than 75 BRAND NEW recipes and a hand full of family favorites too.
8 chapters with a total of 82 quick and easy recipes that are bursting with flavor!!!
Every recipe has a photo that will make your mouth water. It has slow cooker meals, one-pot recipes, quick dinners, simple appetizers, desserts and more!!!
And we have included kitchen tips to make dinnertime less stressful.
We are so excited to share our recipes with you!!! So, don't wait. Go and grab yours today! The Simple Kitchen <-- click here to order.

Helpful Tips to make Bacon Cheddar Beer Bread:
- If you are sensitive to beer you can substitute lemon-lime soda, or ginger ale. I HIGHLY recommend using the beer though. It gives it an incredible flavor that you will miss out on using the substitutions.
What you will need to make Bacon Cheddar Beer Bread:
- 9 x 5 Bread Pan -
- Mixing Bowl - I like a variety of mixing bowls and prep bowls and this set has them all.
Enjoy!
With love from our simple kitchen to yours.
Do you ❤ love ❤ TSRI? Don't miss another recipe. Click here to Subscribe to by Email and receive new recipes in your inbox every day!

Check out more of our favorite bacon cheddar recipes:
Bacon Cheddar Ranch Pull Apart BreadBacon Cheddar Beer Soup with Chicken in Just 25 Minutes
Bacon Cheddar Hasselback Potatoes

Bacon Cheddar Beer Bread
Bacon Cheddar Beer Bread is a simple no-knead recipe that is mixed with a spoon and ready to go in the oven before it is done preheating! Loaded with cheese and bacon this is a winner!
Ingredients
- 3 cups all purpose flour (363 grams)
- 1 tablespoon baking powder
- 1 teaspoon salt
- 3 tablespoons granulated sugar
- 1 1/4 cup shredded cheese (I used Monterey Jack, Colby and Cheddar mixture)
- 1 (12 ounce) bottle of beer (I used Blue Moon)
- 4 slices of bacon, cooked and chopped (or 1/4 cup real bacon bits)
- 2 tablespoons butter, melted
Instructions
- Preheat oven to 350°.
- Prepare a 9"x5" bread pan by greasing with butter. Set aside.
- In a large bowl, combine flour, baking powder, salt and sugar with a whisk. Make a well in the center. Add bacon, about 3/4 of cheese and full beer into the well.
- Stir mixture with a spoon until combined.
- Pour mixture into prepared bread pan. Add remaining cheese. Drizzle with 1 tablespoon of butter. Bake for 30 minutes.
- Remove from oven and drizzle remaining butter over the top.
- Bake for an additional 25-30 minutes or until browned on top and loaf thumps when you tap the top.
- Remove to a wire rack and allow to cool for 5 minutes. Remove from pan and allow to cool on wire rack. You can brush with more butter if you choose.
- Enjoy!
DONNA'S NOTES
- If you are sensitive to beer you can substitute lemon-lime soda, or ginger ale. I HIGHLY recommend using the beer though. It gives it an incredible flavor that you will miss out on using the substitutions.


 + Video")


 + Video")


