")
No-Bake Peppermint Cheesecake Bars (With Video)
No-Bake Peppermint Cheesecake Bars are the best way to enjoy the delicious holiday flavors in a stunning and easy dessert recipe!
")
Hey guys, it’s Catalina from Sweet and Savory Meals here. I am happy to be a contributor on TSRI and add recipes to Donna and Chad’s already great collection. I am very excited about these Peppermint Cheesecake Bars, they taste amazing and I am sure they will be a hit on your holiday dessert table.
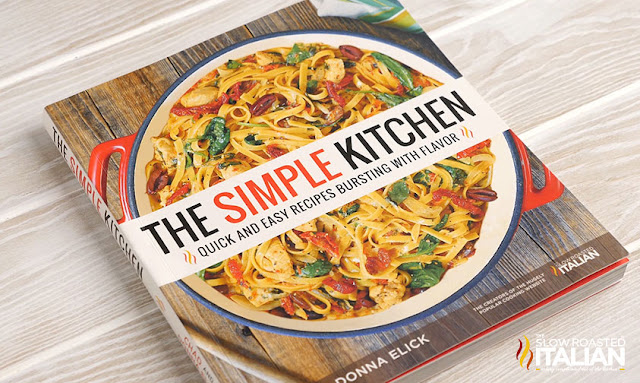
Speaking of simple recipes, of course our new cookbook {The Simple Kitchen - available to order now}is packed with delicious, easy recipes.
The Simple Kitchen is loaded with more than 75 BRAND NEW recipes and a hand full of family favorites too.
8 chapters with a total of 82 quick and easy recipes that are bursting with flavor!!!
Every recipe has a photo that will make your mouth water. It has slow cooker meals, one-pot recipes, quick dinners, simple appetizers, desserts and more!!!
And we have included kitchen tips to make dinnertime less stressful.
We are so excited to share our recipes with you!!! So, don't wait. Go and grab yours today! The Simple Kitchen <-- click here to order.

Helpful Tips to make No Bake Peppermint Cheesecake Bars:
- Make sure you use room temperature cream cheese and on the opposite, very cold heavy whipping cream.
- The hot water should be very hot, boiling water, this will help melt the peppermint candies quicker.
- The bars must be served chilled and must be stored in the refrigerator.
- You can make the recipe in a springform pan, for a round cheesecake or make it as a trifle, served in individual glasses.
- Top with whipped cream right before serving, as the whipped cream hardens in the refrigerator.
What you will need to make No Bake Peppermint Cheesecake Bars:
- 9x13 baking pan – the perfect pan for blondies, brownies and many other delicious desserts. I love this one with the cover.
- Gelatin – I like using it in No Bake Cheesecake recipes, it gives the dessert that authentic cheesecake texture.
- Peppermint Hard Candies - stock up for the holiday season.
Enjoy!
With love from our simple kitchen to yours.
Do you ❤ love ❤ TSRI? Don't miss another recipe. Click here to Subscribe to by Email and receive new recipes in your inbox every day!
") Check out more of our favorite bars and brownies recipes:
Check out more of our favorite bars and brownies recipes:
Best Ever Pecan Pie Bars")
Best Brownies Ever
Easy Lemon Bars
See how easy this No Bake Peppermint Cheesecake Bars is to make. Watch the video!!!
Yield: 12

No-Bake Peppermint Cheesecake Bars
No-Bake Peppermint Cheesecake Bars are the best way to enjoy the delicious holiday flavors in a stunning and easy dessert recipe!
Ingredients
Crust
- 3 cups graham cracker crumbs
- 1/3 granulated sugar
- 1 cup unsalted butter, melted
Cheesecake
- 15 Peppermint hard candies, crushed
- 1/2 cup hot, boiling water
- 2 (7 gram) packets unflavored gelatin
- 3 (8 ounce) package full fat cream cheese, room temperature
- 1 cup granulated sugar
- 1 1/2 cups heavy whipping cream, cold
Garnish
- 10 Peppermint hard candies, crushed
- 1 1/2 cups heavy whipping cream
- 2 tablespoons white granulated sugar
Instructions
- Prepare the Crust: Add all the ingredients to a large bowl, mix with a fork until well combined and press into a lightly greased 9x13 inch pan.
- Prepare the Cheesecake: Add peppermints to a large Ziploc bag. Seal the bag well, but do not make the bag air tight, or the bag will perforate on the first smash. To avoid a mess, place the bag inside another Ziplock bag.Place the bag on a wooden cutting board and using a kitchen mallet, crush the candies.
- Add the crushed candies to a medium bowl and pour hot, boiling water over them. Using a spoon, stir the mixture for 3-5 minutes, until the candies completely melt.
- Sprinkle the two packets of gelatin over the peppermint mixture, let it bloom for 1 minute and whisk it until fully combined. Set aside.
- Add room temperature cream cheese and sugar to a large bowl and using a hand mixer (you can also you a stand mixer for this), whisk it on medium-high speed until creamy and fully combined. Scrape the sides and bottom of the bowl a few times.
- Add the gelatin mixture to the cream cheese, mix it in with the electric mixer starting on low speed and increasing it to high. Scrape the sides and bottom of the bowl a few times.
- Add cold heavy whipping cream to a preferably chilled, cold bowl and beat it on medium-high speed until soft peaks form and the whipped cream holds its shape, about 1-2 minutes. Fold whipped cream into the cheesecake mixture and stir well to combine.
- Add the cheesecake mixture to the pan, level the top with a spatula. Chill for at least 3 hours, better 5-8 hours.
- Garnish: When ready to serve, add cold heavy whipping cream and sugar to a preferably chilled, cold bowl and whisk it on medium-high speed until soft peaks form and the whipped cream holds its shape, about 1-2 minutes.
- Garnish each peppermint cheesecake bar with whipped cream and top with crushed peppermints.
- Enjoy!


Disclosure: Posts may contain affiliate links. If you purchase a product through an affiliate link your price will remain the same and will automatically receive a small commission. Thank you for supporting us, it helps us keep creating new recipes. Sumber https://www.theslowroasteditalian.com
")


")
")
")
")
")
")


 + Video")
 + Video")
 + Video")
 + Video")
 + Video")
 + Video")

 + Video")
")


