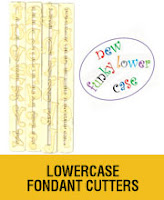
Showing posts with label Chocolate. Show all posts

Peanut Butter Caramel No-Bake Icebox Cake

This no-bake cake starts with a flavor explosion of peanut butter, caramel and chocolate. What could possibly be better? How about a simple recipe with mind blowing results? This fabulous cake is stacked with layer upon layer of sweet and salty creamy peanut butter filling, cream and chocolate cookies. After a trip to the fridge the layers become this incredibly moist and creamy cake... all without ever turning the oven on.
 bake cake starts with a flavor explosion of peanut butter Peanut Butter Caramel No-Bake Icebox Cake


Now if you will excuse me, I need to take a moment to collect my thoughts (and be alone with the last piece of this divine dessert).

My family has been eating Skippy Peanut Butter as long as I can remember. We are a peanut butter household. Whether is it a simple pb&j sandwich, an apple and peanut butter snack, Extreme Peanut Butter Fudge Brownies that leave this house by the truckload or just a spoonful for the heck of it, we our Skippy. Truth be told I have a really great supply of Skippy on hand at all times.  You know, back ups in case we run out and then we have back ups for our back ups just to be sure. LOL

bake cake starts with a flavor explosion of peanut butter Peanut Butter Caramel No-Bake Icebox Cake
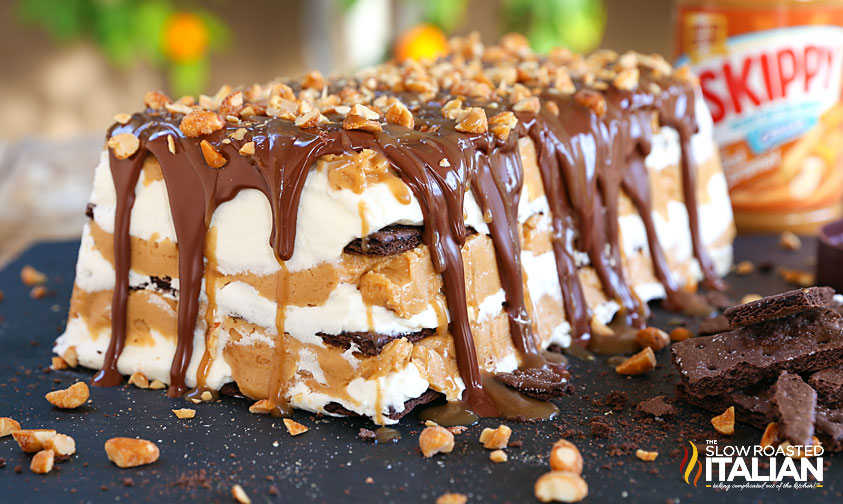
So, I got to work on this fabulous Peanut Butter Caramel No-Bake Ice Box Cake. What is a better flavor combination than peanut butter and chocolate? Peanut butter, caramel and chocolate. Oh my goodness.  It is insanely delish. Layer upon layer of fabulous flavors. I mean look at those scrumptious layers. Peanut butter caramel cream, fresh whipped cream and chocolate graham crackers topped with chocolate, caramel and nuts (because this girl likes some crunch).

This simple recipe is no-bake and only takes a handful of ingredients. Chill it for a few hours or overnight. We like to store it in the freezer and it is the perfect make ahead dessert. Scrumptious and wholly impressive.
bake cake starts with a flavor explosion of peanut butter Peanut Butter Caramel No-Bake Icebox Cake

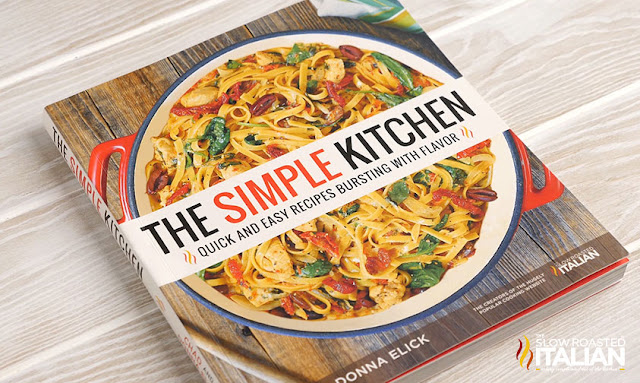
Speaking of simple recipes, of course our new cookbook {The Simple Kitchen - available to order now}is packed with delicious, easy recipes.

The Simple Kitchen is loaded with more than 75 BRAND NEW recipes and a hand full of family favorites too.

8 chapters with a total of 82 quick and easy recipes that are bursting with flavor!!!

Every recipe has a photo that will make your mouth water. It has slow cooker meals, one-pot recipes, quick dinners, simple appetizers, desserts and more!!!

And we have included kitchen tips to make dinnertime less stressful.

We are so excited to share our recipes with you!!! So, don't wait. Go and grab yours today!  The Simple Kitchen <-- click here to order. 

bake cake starts with a flavor explosion of peanut butter Peanut Butter Caramel No-Bake Icebox Cake

Helpful Tips to make Peanut Butter Caramel No-Bake Ice Box Cake:


What you will need to make Peanut Butter Caramel No-Bake Ice Box Cake:


Enjoy!

With love from our simple kitchen to yours. 


Do you   love  TSRI?  Don't miss another recipe.  Click here to Subscribe to by Email and receive new recipes in your inbox every day!
Don't miss a thing! Follow us on Facebook Twitter Pinterest | Instagram ❤ ❤ ❤  
bake cake starts with a flavor explosion of peanut butter Peanut Butter Caramel No-Bake Icebox Cake

Check out more of our favorite no-bake recipes:   


Yield: 12

Peanut Butter Caramel No-Bake Ice Box Cake

This no-bake cake starts with a flavor explosion of peanut butter, caramel and chocolate. What could possibly be better? How about a simple recipe with mind blowing results? This fabulous cake is stacked with layer upon layer of creamy peanut butter filling, cream and chocolate cookies. After a trip to the fridge the layers become this incredibly moist and creamy cake... all without ever turning the oven on.
prep time: 25 minscook time: total time: 25 mins

Ingredients

  • 2 cups heavy whipping cream
  • 1 3/4 cups powdered sugar, divided
  • 1 teaspoon pure vanilla extract
  • 8 ounces cream cheese, softened
  • 1 (15 ounce) jar creamy peanut butter
  • 10-15 chocolate graham crackers
  • 4 ounces chocolate shell ice cream topping (check out our homemade version here)
  • 2 tablespoons caramel topping
  • 1/4 cup honey roasted peanuts, chopped

Instructions

  1. In a tall bowl whip heavy cream with an electric mixer until you can start to see a defined trail through the cream. Add vanilla and slowly add 3/4 cup powdered sugar. Whip until stiff peaks form. (In other words when you turn off the blender and lift the beaters out of the cream, the cream stand up on the end of the beater). Place in the refrigerator while you prepare the remaining ingredients.
  2. To prepare the filling: Combine cream cheese, peanut butter and 1 cup powdered sugar in a large mixing bowl. Beat with an electric mixer until light and fluffy (about 3 minutes). Fold in 1/2 of the whipped cream until it is completely incorporated. Set aside.
  3. Line a 9 x 5-inch baking dish with parchment paper or plastic wrap. Layer 1/3 of the peanut butter cream on the bottom of the pan. Smooth into an even layer.  Add 1/3 of whipped cream on top of the peanut butter cream and use spatula to smooth into an even layer. Top with a layer of graham crackers, breaking them if necessary to make them fit.
  4. Repeat the layers 2 more times, ending with graham crackers. They will slightly peek over your baking dish.
  5. Cover and refrigerate 3-4 hours or freeze for 1-2 hours.
  6. Remove cake from refrigerator or freezer, invert pan onto a plate. Pour chocolate shell topping onto cake (starting at one end and working to the other).  While you are pouring, use an offset spatula to smooth and help the chocolate drip down the sides. Keep in mind the chocolate will harden so you must work fast.
  7. Drizzle the chocolate top with caramel and sprinkle with chopped peanuts.
  8. Refrigerate until ready to serve or serve immediately.
  9. Enjoy!


Originally published 2/20/15

Disclosure: Posts may contain affiliate links. If you purchase a product through an affiliate link your price will remain the same and will automatically receive a small commission. Thank you for supporting us, it helps us keep creating new recipes.
Sumber https://www.theslowroasteditalian.com

Easy Chocolate Ganache

Silky smooth chocolate hazelnut ganache with just 2 ingredients. It really doesn't get easier than this. This recipe is ready in 3 minutes and it is one you will be pulling out again and again.It is perfect for fondue, ice cream topping, dipping cupcakes, frosting cakes and even making truffles. You are going to love it.
 minutes and it is one you will be pulling out again and again Easy Chocolate Ganache


Simple is really my motto these days. Life gets so busy and the easier things are the more likely it is that it will get made. Years ago I would stand over a hot stove stirring chocolate over a double boiler for 10 minutes. I honestly would rather sit down with my family and enjoy their company for those 10 minutes and take a few shortcuts in the kitchen.

I believe that simple cooking should taste great and that is where International Delight comes in. I am hooked on International Delight coffee creamers and have been for some time (check out our 35+ International Delight recipes) and the Fat-Free & Sugar-Free Toasted Hazelnut flavor has really been rocking my world lately.

Adding the creamer to this recipe in place of heavy cream, not only saves on sugar and fat grams (a nice addition), it really packs a wallop of flavor.  This chocolate hazelnut ganache comes together in just 3 minutes and cooled to room temp it is scoopable. 

Now please excuse me while a take a moment with my ganache and fresh strawberries.

 minutes and it is one you will be pulling out again and again Easy Chocolate Ganache


I really try to make some smart choices to save a few fat grams here and there and this Easy Chocolate Ganache is the perfect way to save those grams so I can enjoy a treat without the guilt.


So tell me, how do you keep your self in check? What little things do you do to make a better you?

Enjoy!

With love from our simple kitchen to yours. 

RECIPE AT THE BOTTOM

Do you  love TSRI?  Don't miss another recipe.  Click here to Subscribe to by Email and receive new recipes in your inbox every day!


 minutes and it is one you will be pulling out again and again Easy Chocolate Ganache


=================================================================
PRINT RECIPE

Easy Chocolate Ganache

SERVES 1 (8 ounces)  |  ACTIVE TIME 3 Min  |  TOTAL TIME 3 Min

8 ounces chopped chocolate (or chocolate chips)
1/4 cup (2 ounces)  International Delight Fat-Free & Sugar-Free Toasted Hazelnut Coffee Creamer

Combine ingredients in a microwave safe bowl. Heat for 30 seconds at a time in the microwave, stirring between each time. Repeat until mixture is smooth.

Use to top cake, cupcake or just eat it with a spoon!

COOK'S NOTE: Recipe can be doubled. Simply double the ingredients. Try different flavors by using different International Delight varieties.

I prefer milk chocolate, but you can use your favorite.

To heat on stove top place a heat safe bowl over a pot with 1" of water to create a double boiler.  Stir until mixture is smooth.

The cooler ganache gets the thicker it becomes.  Try these tasty ideas:
  • Drizzle warm over ice cream for a fabulous hot chocolate sundae or use use as chocolate fondue.
  • Allow it to cool to room temperature for thick ribbons, perfect for dipping cupcake tops.
  • Refrigerate 30-60 minutes and allow ganache to thicken, then whip with an electric mixer. You will create a divine chocolate frosting that is perfect for your favorite dessert.
  • Refrigerate over night to get a 'scoopable' consistency.  Roll balls into cocoa powder for tasty truffles or drop balls into cupcake batter for a yummy filling.

Recipe developed by Donna Elick -
Copyright ©2015 – All rights reserved.

This is a sponsored conversation written by me on behalf of International Delight. The opinions and text are all mine.

Originally published 2/4/15


Sumber https://www.theslowroasteditalian.com

Mint Chocolate Chip Fudgy Brownies

Mint Chocolate Chip Fudgy Brownies are a simple recipe for rich and fudgy brownies, loaded with chocolate mint candies and topped with a mint chocolate chip frosting that will rock your world. Then it’s drizzled with an out of this world chocolate ganache. {{swoon}} You need these!

 are a simple recipe for rich and fudgy brownies Mint Chocolate Chip Fudgy Brownies


We are so excited to be partnering with International Delight®  to bring you another fabulous recipe. I don't know about you, but I love my coffee so I always have creamer in the house. I have found this to be an amazing convenient ingredient in cooking and baking sweets. So, of course, when I started thinking about mint chocolate chip frosting I thought of International Delight.


RECIPE AT THE BOTTOM

Happy almost St. Patrick's Day. It has already been an awesome celebration filled with lots of festive treats and not so traditional food. My daughter and I baked up a storm over the weekend so we could celebrate with our friends. We made about 4 dozen of our favorite sugar cookies and decorated the shamrock cookies with our melt in your mouth sugar cookie icing.

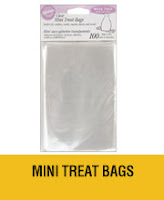
Then we packaged them up in these awesome plastic bags that we use for cookie gifts and attached a little card that says "Just like a friend, a four leaf clover is hard to find. Happy St. Patrick's Day. Your friend, Munchkin". Well, I am soooo not the Pinterest mom anymore. I have completely come to terms with being an Amazon Prime mom, but ya know sometimes that desire to create just takes over, and we end up with the cutest little cookies ever!

So, next, I decided that I wanted to whip up a scrumptious treat to bring to the dentist office too. They take such great care of us, and I just wanted a little thank you. Well, being St. Patrick's Day this week I knew Mint Chocolate Chip was the flavor. I decided to combine that with our luscious fudgy brownies to create the most amazing Mint Chocolate Chip Fudgy Brownies. They are sooo amazing.

They are utterly rich and fudgy with bites of creme de menthe candies speckled throughout. The brownies are topped with the most scrumptious mint chocolate chip frosting made with International Delight French Vanilla Creamer and then they are finished with a chocolate ganache drizzle. What could be more perfect?


By now, you know how much we love their coffee creamers and have for some time (check out our 50+ International Delight recipes).


Enjoy!

With love from our simple kitchen to yours. 

Do you  love TSRI?  Don't miss another recipe.  Click here to Subscribe to by Email and receive new recipes in your inbox every day!


Don't miss a thing! Follow us on Facebook | Twitter | Pinterest | Instagram❤  
 

=================================================================


Mint Chocolate Chip Fudgy Brownies
SERVES 16  |  ACTIVE TIME 15 Min  |  TOTAL TIME 35 Min

1/2 cup unsalted butter
1 cup granulated sugar
1/2 cup unsweetened cocoa powder
1/2 tablespoon vanilla extract
2 large eggs
1/2 cup all-purpose flour
1/4 teaspoon baking powder
1/4 teaspoon salt
1 (8.5 oz) bag creme de menthe thins, divided

Mint Chocolate Chip Frosting
2 cups powdered sugar
4 tablespoons unsalted butter, room temperature
3 tablespoons International Delight French Vanilla Creamer
1 1/2 teaspoon mint extract, to taste
pinch salt
green food coloring
2 tablespoons mini chocolate chips

Chocolate Drizzle
1/4 cup mini chocolate chips
2 tablespoons International Delight French Vanilla Creamer

Preheat oven to 350°F.

Set 16 candy mints aside for garnish and unwrap and cut the remaining candy in half.

Line an 8x8 baking dish with aluminum foil sprayed with non-stick spray and set aside.

Place the butter in a large microwave-safe mixing bowl and melt completely. Add sugar, cocoa, vanilla and eggs. Beat with an electric mixer until well combined. Add the remaining ingredients (except the creme de menthe thins). Mix on low just until completely combined, but do not over mix. Add 1/2 of the halved candies and stir to combine.

Pour into prepared baking dish. Sprinkle the remaining halved candies over the top and lightly press into the batter with a spatula.

Bake for 20 minutes or until a tooth pick comes out clean, well with no batter and no crumb. You may have chocolate if you stick it into a candy mint. Allow to cool completely. I pop them in the fridge or freezer for a few minutes.

Meanwhile, prepare the frosting.

In a large mixing bowl combine the butter and powdered sugar. Beat with an electric mixer until well combined. Add the creamer and beat on low until completely combined. Add the mint extract to taste, I start with 1/2 teaspoon and work my way up until it tastes perfectly minty. Add food coloring and mix until combined. I added 1 drop of green gel food coloring. If you are using liquid, start with 1/4 teaspoon and go from there. Sprinkle in chocolate chips and mix until combined. Once the brownies are cool, frost with the icing.

Meanwhile: combine the 1/4 cup chocolate chips and 2 tablespoons creamer in a microwave safe bowl. Heat for 1 minute. Remove from the microwave and let the chocolate and cream melt together for about 5 minutes. Stir until smooth. Drizzle the chocolate over the frosted brownies.

Serve and enjoy!
DONNA'S NOTES: The creme de menthe candies are the chocolate and mint rectangle candies that are wrapped in silver and green foil.
Recipe developed by Donna Elick -
Copyright ©2017 – All rights reserved.


Can't get enough International Delight? Check them out on Facebook, Pinterest and Instagram. And sign up to get their newsletter for access to an instant coupon, giveaways and more!


This is a sponsored conversation written by me on behalf of International Delight. The opinions and text are all mine.


Sumber https://www.theslowroasteditalian.com

Best Ever Simple Chocolate Cake

Our go-to chocolate cake is so easy and absolutely fabulous! This recipe is made with just one bowl, one whisk and it makes the most spectacular chocolate cake! We love it made as cupcakes, fancy cakes or a simple cake. It is truly perfect.


It's so funny. I actually made this cake on a whim the first time. I was utterly exhausted and just decided to make the recipe on the can of cocoa. OH MY! I was so impressed that this recipes has become our go-to chocolate cake.  

It is made with ingredients that are always in my pantry and I can whip it up with one bowl and one whisk.  Can't ask for a much easier recipe than that.  Of course if you want your frosting really fluffy, I would pull out the hand mixer (unless you are looking for a great arm workout - more power to ya!). 

Whether I am making cupcakes, a fancy cake or a last minute cake this is the one everyone asks for.  So easy, you won't believe it!  And when I have plans to make a cake for chocolate lovin' GiGi, this is the cake I make.  

Give it a try, you won't regret it.  One bowl, one whisk, one FABULOUS cake!

to chocolate cake is so easy and absolutely fabulous Best Ever Simple Chocolate Cake

Speaking of simple recipes, of course our new cookbook {The Simple Kitchen - available to order now}is packed with delicious, easy recipes.

The Simple Kitchen is loaded with more than 75 BRAND NEW recipes and a hand full of family favorites too.

8 chapters with a total of 82 quick and easy recipes that are bursting with flavor!!!

Every recipe has a photo that will make your mouth water. It has slow cooker meals, one-pot recipes, quick dinners, simple appetizers, desserts and more!!!

And we have included kitchen tips to make dinnertime less stressful.

We are so excited to share our recipes with you!!! So, don't wait. Go and grab yours today!  The Simple Kitchen <-- click here to order. 

to chocolate cake is so easy and absolutely fabulous Best Ever Simple Chocolate Cake


Helpful Tips to make Best Ever Simple Chocolate Cake:


    What you will need to make Best Ever Simple Chocolate Cake:

    Enjoy!

    With love from our simple kitchen to yours. 


    Do you   love  TSRI?  Don't miss another recipe.  Click here to Subscribe to by Email and receive new recipes in your inbox every day!

    Don't miss a thing! Follow us on Facebook Twitter Pinterest | Instagram ❤ ❤   

    Check out more of our favorite dessert recipes: 

    No-Bake Strawberry Shortcake Ice Box Cake
    The Best Ever Carrot Cake with Toasted Pecans
    Peanut Butter Fudge Chocolate Cake


    Yield: 10-12

    Hershey's Perfectly Chocolate Cake

    Our go-to chocolate cake is so easy and absolutely fabulous! This recipe is made with just one bowl, one whisk and it makes the most spectacular chocolate cake! We love it made as cupcakes, fancy cakes or a simple cake. It is truly perfect.

    Ingredients

    Hershey's Perfectly Chocolate Cake
    • 2 cups sugar
    • 1-3/4 cups all-purpose flour
    • 3/4 cup HERSHEY'S Cocoa
    • 1-1/2 teaspoons baking powder
    • 1-1/2 teaspoons baking soda
    • 1 teaspoon salt
    • 2 eggs
    • 1 cup milk
    • 1/2 cup vegetable oil
    • 2 teaspoons vanilla extract
    • 1 cup boiling water
    • 1 tablespoon instant coffee granules
    • Double batch of "Perfectly Chocolate" Chocolate Frosting (recipe to follow)
    "PERFECTLY CHOCOLATE" CHOCOLATE FROSTING
    • 1/2 cup (1 stick) butter or margarine
    • 2/3 cup HERSHEY'S Cocoa
    • 3 cups powdered sugar
    • 1/3 cup milk
    • 1 teaspoon vanilla extract
    • 1/2 teaspoon kosher salt

    Instructions

    Cake
    1. Preheat oven to 350°F. Grease and flour two 8-inch round baking pans.
    2. Place 1 cup of water with coffee granules in microwave and bring to boiling. (1 minute at a time).
    3. In a large bowl whisk together sugar, flour, cocoa, baking powder, baking soda and salt.
    4. Add eggs, milk, oil and vanilla; whisk for about 2 minutes. Stir in boiling coffee (batter will be thin).
    5. Pour batter into prepared pans. Bake 30 to 35 minutes or until wooden pick inserted in center comes out clean. Cool 10 minutes; remove from pans to wire racks. Cool completely.
    "PERFECTLY CHOCOLATE" CHOCOLATE FROSTING
    1. Melt butter. Stir in cocoa and salt. Alternately add powdered sugar and milk, beating to spreading consistency.
    2. Add small amount additional milk, if needed. Stir in vanilla. About 2 cups frosting.


    Recipe slightly adapted from Hershey's


    Disclosure: Posts may contain affiliate links. If you purchase a product through an affiliate link your price will remain the same and will automatically receive a small commission. Thank you for supporting us, it helps us keep creating new recipes.

    Sumber https://www.theslowroasteditalian.com

    The Best Ever Outrageous Brownies

    This recipe is the chocolate lovers dream! The Best Brownies Ever are chocolaty, fudgy, soft and melt in your mouth delicious. It is our most requested brownie recipe and I make 2 pans of these and give them as part of our gratitude gifts we hand out each year.
     This recipe is the chocolate lovers dream The Best Ever Outrageous Brownies


    Every year we make a point to take the time to give a gift of homemade goodies and cards to those people who have touched our lives.  Family, friends, postal carriers, neighbors and store clerks are all included.  You get the idea.  One year we had our truck in the shop a lot and the service tech was so helpful that he was on our list that year.

    We started this tradition of gratitude gifts 6 years ago and it is possibly my favorite part of the holiday season.  Embracing the spirit of giving really sets the season off in the right direction, especially since Munchkin was born.  She is in the spirit of giving already and told me "Mommy, we need to help the kids that have no houses because we are vewwy fornuatate (very fortunate)".

    DO.I.NEED.TO.TELL.YOU?  That was probably the proudest moment of my life.  Give me a moment to gush please.   {{{gush}}} OK.  I'm good now.

    Our family and friends are pretty sure they are getting a basket each year and start teasing about what they want in the basket next year, pretty early on.  Usually by Easter we are hearing about the Pecan Pie Bars and The Brownies.  I can not think of one person that disliked either of these fabulous treats.

    I am so excited to finally share our Best Ever Outrageous Brownie recipe with you.  They are rich, chocolaty, fudgy and so soft they will melt in your mouth.  Made with a truckload of chocolate and a sprinkling of coffee you are going to get the most amazing chocolate taste in these brownies with an incredible depth of flavor that you will not forget.

    Get baking.  Your loved ones will thank you for it!

     This recipe is the chocolate lovers dream The Best Ever Outrageous Brownies

    Speaking of simple recipes, of course our new cookbook {The Simple Kitchen - available to order now}is packed with delicious, easy recipes.

    The Simple Kitchen is loaded with more than 75 BRAND NEW recipes and a hand full of family favorites too.

    8 chapters with a total of 82 quick and easy recipes that are bursting with flavor!!!

    Every recipe has a photo that will make your mouth water. It has slow cooker meals, one-pot recipes, quick dinners, simple appetizers, desserts and more!!!

    And we have included kitchen tips to make dinnertime less stressful.

    We are so excited to share our recipes with you!!! So, don't wait. Go and grab yours today!  The Simple Kitchen <-- click here to order. 

     This recipe is the chocolate lovers dream The Best Ever Outrageous Brownies

    Helpful Tips to make The Best Ever Outrageous Brownies:

    • You can also cook this recipe in (2) 9x13 pans. Or bake one 9x13 and halve the recipe if you like.

    What you will need to make The Best Ever Outrageous Brownies:


    Enjoy!

    With love from our simple kitchen to yours. 


    Do you   love  TSRI?  Don't miss another recipe.  Click here to Subscribe to by Email and receive new recipes in your inbox every day!

    Don't miss a thing! Follow us on Facebook Twitter Pinterest | Instagram ❤ ❤ ❤  
     This recipe is the chocolate lovers dream The Best Ever Outrageous Brownies

    Check out more of our favorite brownie recipes: 


    Yield: 48 or 24 Large

    The Best Ever Outrageous Brownies

    This recipe is the chocolate lovers dream! The Best Brownies Ever are chocolaty, fudgy, soft and melt in your mouth delicious. It is our most requested brownie recipe and I make 2 pans of these and give them as part of our gratitude gifts we hand out each year.
    prep time: cook time: 35 minstotal time: 35 mins

    Ingredients

    • 1 pound (4 sticks) unsalted butter
    • 1 pound plus 12 ounces semisweet chocolate chips, divided
    • 6 ounces bittersweet chocolate
    • 8 large eggs
    • 1 tablespoon instant coffee granules
    • 2 tablespoons pure vanilla extract
    • 2 1/4 cups granulated sugar
    • 1 1/4 cups all-purpose flour, divided
    • 1 tablespoon baking powder
    • 1 teaspoon kosher salt
    • unsweetened cocoa, to dust pan

    Instructions

    1. Preheat oven to 350°F.
    2. Butter a 12 x 18 x 2-inch baking sheet and dust with cocoa (this keeps the brownies from having a white powdery appearance)
    3. Melt together the butter, 1 pound of chocolate chips, and the bittersweet chocolate in a microwave safe medium bowl.  Heat in 30 second increments until melted.  Stir between each heating. Allow to cool slightly.
    4. In a large bowl, stir (do not beat) together the eggs, coffee granules, vanilla, and sugar. Stir the warm chocolate mixture into the egg mixture and allow to cool to room temperature.
    5. Add 1 cup flour, baking powder and salt to a sieve and sift into chocolate mixture.
    6. Toss the remaining 12 ounces of chocolate chips with 1/4 cup of flour.  Add them to the chocolate mixture and stir to combine.
    7. Pour batter into prepared baking pan.
    8. Bake for 30-35 minutes until a toothpick inserted in the center comes out clean.  Half way in between cooking time; rap the baking sheet against the oven shelf to force the air to escape from between the pan and the brownie dough.  Use care not to overbake! Allow brownies to cool thoroughly, cut into 48 brownie squares.
    9. Serve and enjoy!

    DONNA'S NOTES

    1. You can also cook this recipe in (2) 9x13 pans. Or bake one 9x13 and halve the recipe if you like.


    Recipe adapted from Ina Garten 


    Originally published 12/4/13


    Disclosure: Posts may contain affiliate links. If you purchase a product through an affiliate link your price will remain the same and will automatically receive a small commission. Thank you for supporting us, it helps us keep creating new recipes.

    Sumber https://www.theslowroasteditalian.com

    Death by Chocolate Cookies

    Death by Chocolate Cookies are bursting with heavenly chocolate! A simple recipe with 5 layers of ooey gooey chocolay goodness will have the chocolate lovers in your life giddy with delight!
     layers of ooey gooey chocolay goodness will have the chocolate lovers in your life giddy  Death by Chocolate Cookies


    Let’s take a moment to think about this.  I love Death by Chocolate.  Anything and everything I have ever created with that theme in mind has been to die for.  No pun intended.  OK, well maybe I did plan that out.

    My favorite Death by Chocolate Cake takes a full day to prepare and 2 sink loads of dishes, a FULL day.  I know, I know.  I was once an overachiever with a lot more time on my hands.  Seven layers of heavenly chocolate beautifully packaged into this fabulous cake.  If you have someone to make it for you…  You totally need to try it.

    After some self-therapy and coming to terms with the above delicious creation and the fact that I just don’t have that kind of time, I decided to simplify.  So, I used that fantabulous theme to create a Death by Chocolate Bundt Cake.  With four incredible kinds of chocolate packed into a simple and impressive Bundt cake (with an awesome Kahlua kick), I thought I had found my true Death by Chocolate love…

    THEN… Last week my friend Liz from That Skinny Chick Can Bake posted these Death by Chocolate Cookies.  You know I was on her site faster than lightening!  The idea of my favorite rich, decadent, dessert in a bite sized package thrilled me.  I made them the very next day.

    Such an easy recipe and all that flavor packed into a tiny cookie.  This is currently my favorite Death by Chocolate endeavor.  I packed 5 kinds of chocolate into that bite sized cookie.  Milk, Semi-sweet, bittersweet, cocoa and white, 5 layers of ooey gooey goodness.  Few dishes and the first batch was out of the oven less than 30 minutes later!  SCORE.

    Enjoy!

    With love from our simple kitchen to yours. 

    Do you   love  TSRI?  Don't miss another recipe.  Click here to Subscribe to by Email and receive new recipes in your inbox every day!


    Don't miss a thing! Follow us on Facebook Twitter Pinterest | Instagram ❤ ❤ 

     layers of ooey gooey chocolay goodness will have the chocolate lovers in your life giddy  Death by Chocolate Cookies


    Yield: 6 Dozen (1 tablespoon) cookies

    Death by Chocolate Cookies

    Death by Chocolate Cookies are bursting with heavenly chocolate! A simple recipe with 5 layers of ooey gooey chocolay goodness will have the chocolate lovers in your life giddy with delight!

    Ingredients

    • 1 cup plus 1 tablespoon all-purpose flour 
    • 1/4 cup cocoa powder
    • 1 teaspoon baking powder
    • 1/8 teaspoon salt 
    • 8 ounces semi-sweet chocolate chips
    • 2 large eggs
    • 1 tablespoon vanilla extract 
    • 5 tablespoons butter, at room temperature
    • 3/4 cup light brown sugar, packed 
    • 1/4 cup granulated sugar
    • 1/2 cup bittersweet chocolate chips
    • 1/2 cup milk chocolate chips (or chopped milk chocolate bar)
    • 1/2 cup semi-sweet chocolate chips 
    • 1/2 cup white chocolate chips 

    Instructions

    1. Preheat oven to 350ΒΊ.   Prepare 2 baking sheets with parchment paper.
    2. In a small heat safe bowl, melt 8 ounces of semi-sweet chocolate chips in the microwave until smooth.  Stir and set aside. 
    3. In a large mixing bowl add butter and beat with an electric mixer until smooth and creamy, about 1 minute.  Beat in the sugars.  Add the eggs and vanilla, mix until incorporated. 
    4. Add the melted chocolate and beat until combined. Using a small sieve or sifter, sift in the dry ingredients (flour, cocoa, baking powder and salt) and mix on low speed until just combined. Fold in the chocolate chips.
    5. Using a 1 tablespoon scooper or heaping teaspoonful drop cookie dough onto prepared baking sheets.
    6. Bake for 9-11 minutes; until the cookies have begun to set.  The center may still appear soft, they will firm up as they cool.
    7. Allow cookies to cool on baking sheet for at least 5 minutes before transferring to a wire rack to cool completely.
    8. Serve and enjoy!


    Disclosure: Posts may contain affiliate links. If you purchase a product through an affiliate link your price will remain the same and will automatically receive a small commission. Thank you for supporting us, it helps us keep creating new recipes.
    Sumber https://www.theslowroasteditalian.com

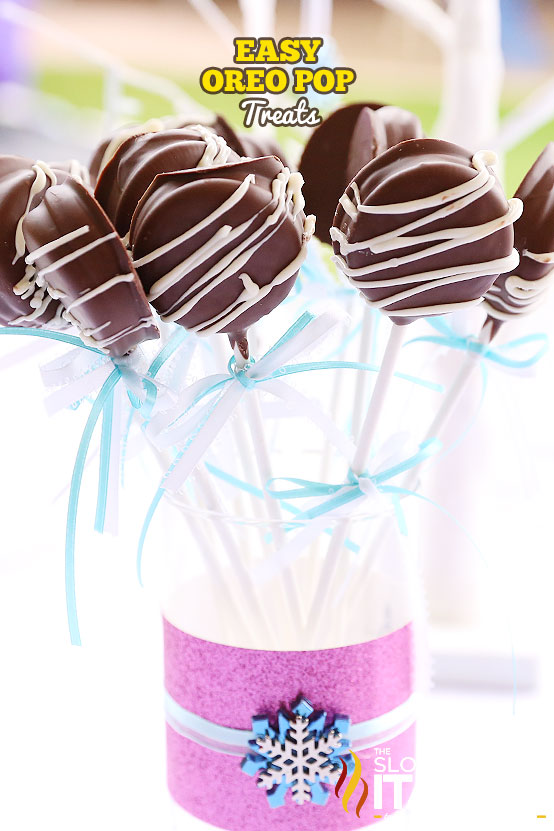
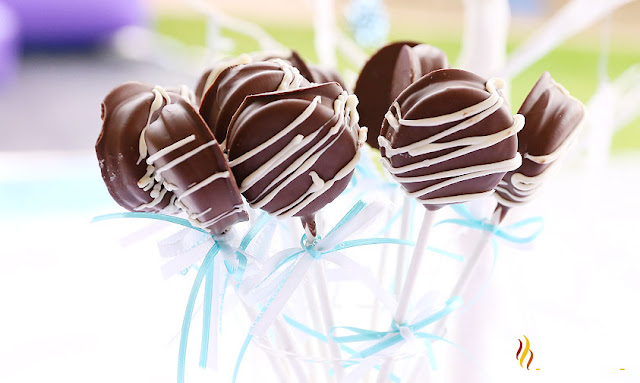
    Chocolate Covered Oreo Pops

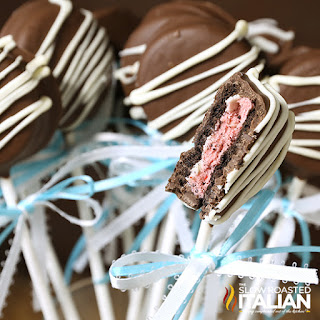
    Professional looking party treats like these Chocolate Covered Oreo Pops are so easy you can make them yourself. We have had these on every dessert table for every single party we host. They are a crowd favorite! I mean who doesn't like Oreo's? Check out our simple step-by-step How To on these Easy Oreo Pops with photos from all of our party pops. Personalized pops? No problem!
    Professional looking party treats like these  Chocolate Covered Oreo Pops


    I love love love party planning and I truly enjoy creating the theme and the treats to go along with it. Over the last 6 years I have planned 6 birthday parties for my daughter and had a fun theme and coordinating treats to go with each one. One of the stars on the dessert table is always our Easy Oreo Pops. With everything from chocolate drizzled, sprinkle covered and personalized pops I have done it all. With our simple step by step how-to you can make these too!

    Professional looking party treats like these  Chocolate Covered Oreo Pops

    Here are the color themes that I used for our parties. A few years I used Tappit Fondant Cutters to decorate her cookies. Some years I used non pareil sprinkles that matched the theme and a few years I drizzled chocolate across the top. They are all stunning and always a huge crowd pleaser. They are so popular that I have made them for friends and family as fun gifts too!

    Elephant Birthday Party Theme (1st) - Pink and white
    Elmo Birthday Party Theme (2nd) - Red, Orange, Yellow and Pink
    Cat in the Hat Birthday Party Theme (3rd) - Red, Blue, White and Black
    Dora the Explorer Birthday Party Theme (4th) - Pink and Purple
    Frozen Birthday Party Theme (5th) - Blue, Purple, Silver and White
    Minnie Mouse Birthday Party Theme (6th) - Pink, Red, Yellow and White

    Enjoy!

    With love from our simple kitchen to yours. 

    RECIPE AT THE BOTTOM

    Do you  love TSRI?  Don't miss another recipe.  Click here to Subscribe to by Email and receive new recipes in your inbox every day!


    Professional looking party treats like these  Chocolate Covered Oreo Pops

    Don't miss a thing! Follow us on Facebook | Twitter | Pinterest | Instagram❤ 


    Professional looking party treats like these  Chocolate Covered Oreo Pops


    =================================================================
    PRINT RECIPE
     

    Chocolate Covered Oreo Pops
    SERVES 20  |  ACTIVE TIME 25 Min  |  TOTAL TIME 2 Hours 25 Min


    Professional looking party treats like these  Chocolate Covered Oreo Pops1 package Double Stuf Oreos (or your favorite)
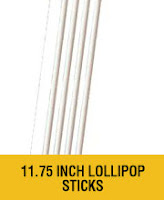
    24 lollipop sticks
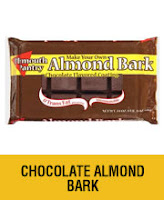
    1 (24 ounce) package Vanilla or Chocolate Almond Bark

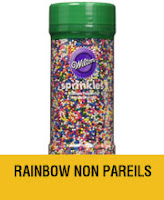
    Optional decorating ideas: sprinkles that match your theme or Fondant Cutters and Fondant.

    Prepare sprinkles or fondant letters prior to beginning your Oreo Pops.

    Line your counter top with parchment or wax paper. (You can also use cookie sheets).

    Separate all of the Oreo's by gently and carefully twisting them apart. Place cookie halves with the filling in the top row and place the cookies with no filling off to the side.

    Place half of Almond Bark (candy coating) in a microwave safe tall bowl. I like to use a tall skinny measuring cup. It makes for easier dipping. Microwave for 30 seconds at a time until completely melted, stirring in between each interval.

    Dip the tip of a lollipop stick in the melted candy coating. Gently press the coated lollipop stick into the cookie filling. Gently place a cookie top with no filling over the stick and carefully press down. NOTE: too much pressure will break the cookie. Then you will have to eat it and you may not have enough for your party. To be safe you may want to buy two packs.

    Repeat until all cookies have sticks in them. If there are any left over you can save them for later or  eat them. I won't judge. This is hard work after all.

    Allow the melted candy coating to set for a few moments.

    Check melted candy coating to be sure it is still very soft. If it firms up a little, pop it back in the microwave. Once your bowl starts to get low add more candy coating and melt.

    Dip one cookie pop into the melted candy coating. Swirl back and forth, carefully to ensure you have a good coating. You may want to gently tap the stick on the bowl to allow some of the coating to drip off before placing on your parchment paper.

    Place on parchment paper. Decorate with sprinkles if desired or place fondant cut outs on top at this point. You do not want to wait for the candy coating to dry or the sprinkles/fondant will not stick. If you are drizzling with chocolate you can wait until they dry.

    Repeat until all cookies are coated and decorated.

    Allow to set until dry. If you are bagging them, wait until dry place a bag over top and close with a ribbon.

    Serve and enjoy!


    CLICKABLE SUPPLY LIST - click on the supply list image and the link will open in a new tab.

    Professional looking party treats like these  Chocolate Covered Oreo PopsProfessional looking party treats like these  Chocolate Covered Oreo PopsProfessional looking party treats like these  Chocolate Covered Oreo Pops
    Professional looking party treats like these  Chocolate Covered Oreo PopsProfessional looking party treats like these  Chocolate Covered Oreo PopsProfessional looking party treats like these  Chocolate Covered Oreo Pops
     
    Professional looking party treats like these  Chocolate Covered Oreo PopsProfessional looking party treats like these  Chocolate Covered Oreo PopsProfessional looking party treats like these  Chocolate Covered Oreo Pops


    Recipe developed by Donna Elick -
    Copyright ©2016 – All rights reserved.

    =================================================================

    Check out some of our favorite party treats:  Click on the image or the bold recipe title and it will open each one in a new tab.

    Professional looking party treats like these  Chocolate Covered Oreo Pops

    Chocolate Covered Marshmallow Pops are a quick and easy, yet impressive homemade treat. Perfect for gift giving and they make an amazing accompaniment to any dessert table!

    Professional looking party treats like these  Chocolate Covered Oreo Pops
    Crockpot Candy is the easiest and most impressive homemade candy ever.  A rich chocolaty, peanutty 4 ingredient recipe that you simply toss in the slow cooker, stir a few times and scoop it out.  It doesn't get much easier than that!

    Disclosure: Posts may contain affiliate links. If you purchase a product through an affiliate link your price will remain the same and will automatically receive a small commission. Thank you for supporting us, it helps us keep creating new recipes.
    Sumber https://www.theslowroasteditalian.com