
Homemade No-Yeast Bread
Homemade No-Yeast Bread is the perfect loaf to make with just 5-Ingredients and no mixer required! This homemade bread also has no eggs, and you can make a loaf in 35 minutes!
When time is short and you are craving a crusty loaf of homemade bread, this no-yeast bread recipe can be your go-to solution.


Disclosure: Posts may contain affiliate links. If you purchase a product through an affiliate link your price will remain the same and will automatically receive a small commission. Thank you for supporting us, it helps us keep creating new recipes. Sumber https://www.theslowroasteditalian.com
When time is short and you are craving a crusty loaf of homemade bread, this no-yeast bread recipe can be your go-to solution.
What is the texture of no yeast bread like?
Any bread without yeast will be a little denser than yeast bread. Without the lift and rise from yeast, it will not be light and fluffy like sandwich bread or dinner rolls are. The fat provides moisture and a little extra flavor (especially with the butter flavored shortening) to the bread.
Also, the bread may fall apart just a little bit easier (but not in a dry crumb type of way). The good news is, it doesn’t affect the deliciousness of the bread.

RECIPE INGREDIENTS
- All-purpose flour - Do not use bread flour or whole wheat flour, as they are much heavier than AP flour. As a result, the bread will be too dense and doughy.
- Baking powder - I have not tested this recipe without baking powder.
- Salt - Fine grain kosher salt is the best for bread recipes like this one.
- Butter, margarine or vegetable shortening, room temperature (I really like butter-flavored shortening for extra flavor, but you can use regular shortening). I personally prefer butter and rarely use margarine but all things considered, we are trying to work with things that most everyone has in their pantry.
- Milk - 2% and whole milk work well. Dairy-free milk is another option. If all else fails water will work too.
- Optional add-ins - you can add sugar if you like your bread on the sweet side. Honey would also be tasty. Both are delicious with milk but I haven't tested them using water. Your favorite spices such as thyme, rosemary or oregano would be delicious.

How to make bread without yeast
The complete ingredient list and instructions are shown in the recipe card at the bottom of this post.Recipe tips for the perfect loaf of no yeast bread
- Incorporating the ingredients - When you add the milk to the dry ingredients, use a wooden spoon or your hands to combine everything. I find it easiest to mix everything together with my hands.
- Kneading the dough - Gently knead the dough to combine the ingredients well, but you don’t need to go crazy with it. To prevent a tough loaf of bread, avoid kneading the dough more than 10 times.
- Forming the loaf - Form the dough into a round ball and then flatten it. You do not want a round loaf of dough. Flatten it to a maximum thickness of 1 1/2 inches. Otherwise, it will not cook through completely. Also, use the tip of a sharp knife to score a cross on the top of the loaf. This serves as a vent for steam to escape during baking.
- Testing for doneness - Bake for 30-35 minutes or until the loaf is pale brown in color. If you turn the bread over and tap on it, it should sound hollow.

What you need to make Homemade No-Yeast Bread
- Baking sheet - Jelly Roll Pans (baking sheets with sides) - used for everything from cookies to roasting, a good baking pan will last for years.
- Parchment paper
- Large bowl - I like a variety of mixing bowls and prep bowls and this set has them all.
- Spoon
- Cooling rack - These are great for cooling just about everything and for inserting into your 1/4 sheet jelly roll pans
- Bread knife - I love a good bread knife. It is one of my essential knives. This one, I have been using for a decade! I also love to slice tomatoes with it.

FAQs
- What if I don’t have milk?
Follow the directions on the container of your powdered milk on what ratio of water to powder is.
You can even use water in a pinch.
Feel free to experiment with it and tell me what you think!

- What can I add to homemade no-yeast bread?
I think that the bread tastes great on its own, but you can certainly add in different ingredients for a different flavor.
Try adding in your favorite herbs such as thyme, parsley, or oregano. You can also add in grated cheese for a cheesy bread.
If you are looking for sweetness consider adding 2 tablespoons of sugar or honey.
Note: If you add in cheese, you may need to bake the bread for a little longer than 35 minutes.

- How long can you store the bread?
Emergency bread will stay fresh for 4-5 days at room temperature. It’s still safe to eat after that time, but it will most likely be stale by then.
To store the bread after slicing, place it in a paper bag. Be sure to remove as much air as possible before tightly closing up the bag.
You can also freeze this bread for later use. I recommend slicing it before freezing. You can freeze for up to 6 months.
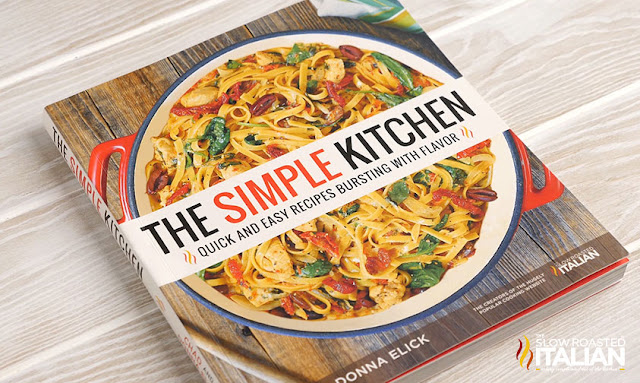
Speaking of simple recipes, of course our new cookbook {The Simple Kitchen - available to order now}is packed with delicious, easy recipes.
The Simple Kitchen is loaded with more than 75 BRAND NEW recipes and a hand full of family favorites too.
8 chapters with a total of 82 quick and easy recipes that are bursting with flavor!!!
Every recipe has a photo that will make your mouth water. It has slow cooker meals, one-pot recipes, quick dinners, simple appetizers, desserts and more!!!
And we have included kitchen tips to make dinnertime less stressful.
We are so excited to share our recipes with you!!! So, don't wait. Go and grab yours today! The Simple Kitchen <-- click here to order.
With love from our simple kitchen to yours.
Do you ❤ love ❤ TSRI? Don't miss another recipe. Click here to Subscribe to by Email and receive new recipes in your inbox every day!

Yield: 1 Loaf
Homemade No-Yeast Bread
Homemade No-Yeast Bread is the perfect loaf to make in an emergency. This unleavened bread also has no eggs, so you can make a loaf in 35 minutes!
prep time: 5 Mcook time: 30 Mtotal time: 35 M
ingredients:
- 2 1/2 cups all-purpose flour
- 2 teaspoons baking powder
- 1 teaspoon kosher salt
- 1/2 cup butter, margarine or butter flavored shortening - room temperature
- 1 1/4 cups whole milk (2% will work too)
instructions:
How to bake Homemade No-Yeast Bread
- Preheat the oven to 375°F. Prepare a baking sheet with parchment paper or a silicone mat. Set aside.
- In a large bowl, combine all the ingredients together EXCEPT for the milk.
- Pour in the milk in about 1/3 cup at at time and stir with a wooden spoon. Repeat until all of the milk is incorporated.
- Turn dough out to countertop, lightly dusted with flour.
- Gently knead the dough until everything is combined but try not to knead the dough more than 10 times to prevent a tough loaf of bread.
- To knead dough: fold it in half, gently press the dough away from you with the heel of your hand and then turn the dough. Repeat.
- Form into a round ball and flatten dough until it is about 1 1/2 - 2 inches thick.
- Place dough onto the prepared baking sheet.
- Score a 1/2" deep cross on the top of the bread with a sharp knife, this will help the bread bake through.
- Bake for 30-35 minutes or until pale brown in color. If you turn the bread over and tap on it, it should sound hollow.
- For best results allow bread to cool on a wire rack before cutting, at least 30 minutes.
DONNA'S NOTES
- If milk is not available to you, feel free to use powdered milk instead. Follow the directions on the container of your powdered milk on what ratio of water to powder is. You can even use water in a pinch.
- Homemade No-Yeast Bread will stay fresh for 4-5 days at room temperature. It’s still safe to eat after that time, but it will most likely be stale by then. To store the bread after slicing, place it in a paper bag. Be sure to remove as much air as possible before tightly closing up the bag.You can also freeze this bread for later use. I recommend slicing it before freezing. You can freeze for up to 6 months.
Disclosure: Posts may contain affiliate links. If you purchase a product through an affiliate link your price will remain the same and will automatically receive a small commission. Thank you for supporting us, it helps us keep creating new recipes.


 + Video")
 + Video")
 + Video")
 + Video")
 + Video")
 + Video")
 + Video")
 + Video")
 + Video")
")
")


