
No-Bake Cookie Dough Ice Cream Cake
No-Bake Cookie Dough Ice Cream Cake is the summer dessert of your dreams! Your favorite ice cream (in this case chocolate) is sandwiched between two layers of indulgent edible cookie dough - it's a giant-sized childhood favorite comes to life!
No-Bake Cookie Dough Ice Cream Cake is a dessert lover's dream!
Imagine taking everything you love about chocolate, cookie dough, ice cream sandwiches, and cake and turning it all into this mashed-up No-Bake Cookie Dough Ice Cream Cake masterpiece every summer birthday party deserves.You'd have a recipe like this one - a recipe that will be requested from everybody from the youngest to the oldest. Because honestly...who doesn't love a big slice of ice cream cake on a hot day?
When you add cookie dough to the mix, things get a little crazy. Everyone remembers sneaking bites from the bowl of cookie dough as a kid (and some of us still do it as adults) and never thinking twice about it.
 Some genius somewhere one day decided that edible cookie dough (meaning egg-free and totally safe to eat) needed to be a thing - and now here we are, using it as layers in a cake. If you've never tried edible cookie dough on its own, I highly recommend it!
By the way, hi! I'm Erica from The Crumby Kitchen and I'm a new contributor here on TSRI. You'll see me right here once a month, sharing some of my favorite party-style recipes, everything from desserts to main dishes! I'm excited to show off my stuff, and I hope you'll stop by my blog later on for even more delicious recipes.
If you're not a fan of chocolate ice cream, you're missing out. But the good news is...well, this is your cake! You can substitute absolutely any ice cream or frozen yogurt flavor you want!
My favorite options include plain old vanilla ice cream, coffee ice cream, dulce de leche ice cream, or butter pecan ice cream.
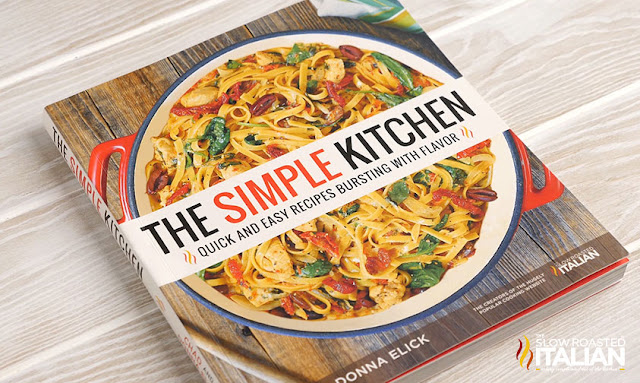
Speaking of simple recipes, of course our new cookbook {The Simple Kitchen - available to order now}is packed with delicious, easy recipes. The Simple Kitchen is loaded with more than 75 BRAND NEW recipes and a hand full of family favorites too.
8 chapters with a total of 82 quick and easy recipes that are bursting with flavor!!! Every recipe has a photo that will make your mouth water. It has slow cooker meals, one-pot recipes, quick dinners, simple appetizers, desserts and more!!! And we have included kitchen tips to make dinnertime less stressful.
8 chapters with a total of 82 quick and easy recipes that are bursting with flavor!!! Every recipe has a photo that will make your mouth water. It has slow cooker meals, one-pot recipes, quick dinners, simple appetizers, desserts and more!!! And we have included kitchen tips to make dinnertime less stressful.
We are so excited to share our recipes with you!!! So, don't wait. Go and grab yours today! The Simple Kitchen <-- click here to order.

WHERE TO ORDER:
🔥 Amazon 🔥 Barnes & Noble 🔥 Books-a-Million 🔥 IndieBound
Helpful Tips to make No-Bake Cookie Dough Ice Cream Cake:
- The edible cookie dough layers are egg-free, but to avoid any possibility of E. Coli contamination, toast your flour before using it in the recipe. Spread your flour on a baking sheet or Silpat and bake for 5 minutes at 350° F. Let cool completely, then use as directed. You can also microwave the flour instead - just make sure it comes to 165° F before using it.
- Set aside about 1 cup of the cookie dough before making your layers to use as garnish! The cute little cookie dough balls on top of the cake are quick and easy to roll while the ice cream sets. Place the balls on a parchment-lined plate and chill, then garnish your cake with them before serving.
- A springform pan makes creating this cake a breeze. It holds its shape while you press in the soft ice cream, freezes into a perfect round, then releases it all with no fuss. Line the pan generously with plastic wrap before molding your first layer of cookie dough to make removal even easier.
- Soften your ice cream before attempting to layer it in the pan. It's much easier to handle and you won't get your hands nearly as dirty.
- Press your top layer of cookie dough in a separate cake pan (the same size as your springform.) The cookie dough is very soft when it's fresh, and will be difficult to press into the softened ice cream. Freeze them separately, then layer the hardened cookie dough over the ice cream layer before decorating.
- Run the knife under a steady stream of hot water until the blade is warm, then slice up your cake, reheating the blade between slices. It goes in and out like buttah.
- Use this easy Chocolate ganache
- Use this easy Chocolate Whipped Cream
What you will need to make No-Bake Cookie Dough Ice Cream Cake:
- Springform Pan - The best pan for this cake! It keeps everything together in the freezer, and you won't have to struggle to remove the cake from it since the sides pop right off!
- KitchenAid Mixer - A good stand mixer makes softening ice cream so easy! Pull your ice cream from the freezer 15 minutes before you use it, then pop it in the mixer, turn it on, and watch it soften without turning to liquid. The end result is a perfect ice cream cake that doesn't taste gummy or freezer-burnt.
- Piping Bags & Decorating Tips - Add a little extra fancy touch to your cakes & desserts! Zipper bags are fine, but fancy swirls and swags are very easy and possible with the right bags & tips at your disposal.
- Sharp Knife - The only way to cut through frozen edible cookie dough and ice cream without making a huge mess.
Enjoy!
With love from our simple kitchen to yours.
Do you ❤ love ❤ TSRI? Don't miss another recipe. Click here to Subscribe to by Email and receive new recipes in your inbox every day!
Don't miss a thing! Follow us on Facebook | Twitter | Pinterest | Instagram ❤ ❤ ❤

Check out more of our favorite no-bake recipes:
No-Bake Summer Berry Icebox Cake
Strawberry Shortcake No-Bake Icebox Cake
Lemon cloud No-Bake Icebox Cake
Peanut Butter Caramel No-Bake Icebox Cake
Cherry Chocolate Chip Brownie Icebox Cheesecake
Yield: 8-10 Servings

No-Bake Cookie Dough Ice Cream Cake
No-Bake Cookie Dough Ice Cream Cake is the summer dessert of your dreams! Your favorite ice cream (in this case chocolate) is sandwiched between two layers of indulgent edible cookie dough - it's a giant-sized childhood favorite comes to life!
prep time: 30 MINScook time: total time: 30 mins
Ingredients
- 3/4 cup unsalted butter, softened
- 1 cup brown sugar, packed
- 2 teaspoons vanilla extract
- 3 cups all-purpose flour
- Pinch kosher salt
- 1 can sweetened condensed milk
- 3 cups mini chocolate chips, plus more for garnish
- 1/2 gallon chocolate ice cream, slightly softened
- Chocolate ganache, for garnish
- Chocolate Whipped Cream
Instructions
- Line both an 8-inch springform pan and an 8-inch cake pan with plastic wrap, making sure it comes all the way up the sides of the pans. Enough to use as a handle. Set aside.
- In the bowl of a stand mixer, cream the butter and sugar on high speed for 3 minutes until fluffy. Add the vanilla extract and mix until blended.
- In a separate bowl, whisk together the flour and salt.
- Add half of the flour mixture to the butter and mix well. Pour in the condensed milk and mix until combined, then add the remaining flour. Mix until well combined. Fold in the chocolate chips.
- Reserve 1 cup of cookie dough, then divide the remaining dough between the two prepared pans. Press the dough into flat, even layers.
- Place the softened ice cream into the clean bowl of the stand mixer. Beat on medium-low speed until consistently soft and creamy, then pour it into the springform pan on top of the cookie dough layer. Even out the ice cream layer with a spatula.
- Cover both pans with plastic wrap and freeze until ice cream is solid, at least 4-6 hours.
- Meanwhile, pinch off little bits of the remaining cookie dough and form them into balls. Set the balls on a parchment-lined plate, then chill in the refrigerator or freezer until ready to use.
- When ready to assemble, remove layers from freezer and unwrap. Remove the cake from the springform pan and place it on a serving board or plate. Place the second layer of cookie dough on top of the ice cream.
- Drizzle warm ganache on top of the cake, allowing it to drip down the sides. Pipe rosettes of chocolate whipped cream around the top edge, then sprinkle with additional chocolate chips. Pile the cookie dough balls in the center of the cake.
- To slice the cake, run a sharp knife under a steady stream of hot water until the blade is warm. Slice up your cake, reheating the blade between slices.


Disclosure: Posts may contain affiliate links. If you purchase a product through an affiliate link your price will remain the same and will automatically receive a small commission. Thank you for supporting us, it helps us keep creating new recipes. Sumber https://www.theslowroasteditalian.com


