")
Best Ever Easy Lemon Bars (Video)
Easy Lemon Bars are my go-to lemon dessert recipe. These mouthwatering lemon bars are bright and vibrant, they are utterly delicious. The creamy texture and lemony flavor makes these a crowd favorite! Easy prep, easy cleanup and gone in a snap. My perfect ANYTIME bars. Truly the best lemon bars ever!
I am sure you may already know, but it is a rare occasion when I would turn away lemon. I love it more than chocolate.
When I am not eating lemon, I am dreaming about it... my Lemon Love Pinterest board is loaded with inspiration for future recipes!
")
I crave lemon all summer long and these lemon bars are the perfect cure for that craving. Summer harvest brings truckloads of fresh berries and nothing goes better with fresh berries than lemon.
")
The perfect summer treat that comes together in no time and disappears just as quickly. I brought these to a mom's night out and a few pot luck's last year.
I tell you there was never a crumb left. Just make sure you bring the recipe with you, because you will get a lot of requests for it!
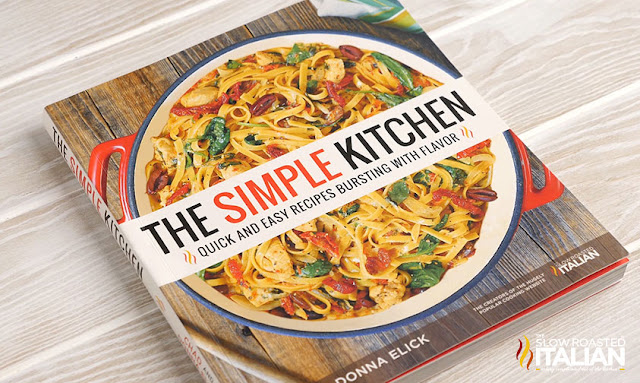
Speaking of simple recipes, of course our new cookbook {The Simple Kitchen - available to order now}is packed with delicious, easy recipes. The Simple Kitchen is loaded with more than 75 BRAND NEW recipes and a hand full of family favorites too.
8 chapters with a total of 82 quick and easy recipes that are bursting with flavor!!! Every recipe has a photo that will make your mouth water. It has slow cooker meals, one-pot recipes, quick dinners, simple appetizers, desserts and more!!! And we have included kitchen tips to make dinnertime less stressful.
We are so excited to share our recipes with you!!! So, don't wait. Go and grab yours today! The Simple Kitchen <-- click here to order.

Helpful Tips to make Best Ever Easy Lemon Bars:
- To prepare lemons, wash them gentle with water and a light brush. Dry them, then zest. After they are zested, juice them.
- Make sure your parchment paper hangs over the pan on both sides. These make perfect handles and easy lifting out of the pan.
- If the dough is too sticky to press into the pan, spinkle a little flour on your hands.
- Allow to cool completely before cutting and serving.
What you will need to make Best Ever Easy Lemon Bars:
- 9 x 9 Baking Pan
- Citrus Juicer - This makes juicing the lemon much easier. Plus you’ll get every last drop out.
- Mixing Bowls - I like a variety of mixing bowls and prep bowls and this set has them all.
- Whisk - I have had this set for over 10 years and it is still as good as the day I bought it. With 3 sizes there is a whisk for every job.
- Microplane/Zester - This is great for zesting citrus. I also use mine to grate garlic.
Enjoy!
With love from our simple kitchen to yours.
Do you ❤ love ❤ TSRI? Don't miss another recipe. Click here to Subscribe to by Email and receive new recipes in your inbox every day!
")
Check out more of our favorite lemon summertime dessert recipes:
Raspberry Lemonade Pound CakeRaspberry Lemonade Yogurt Ice Pops
Lemon Burst Pound Cake
Lemon Cloud No-Bake Icebox Cake
See how easy these Best Ever Easy Lemon Bars is to make. Watch the video!!!
Yield: 16

Easy Lemon Bars Recipe
Easy Peasy Lemon Bars are my go-to lemon dessert recipe. These mouthwatering lemon bars are bright and vibrant, they are utterly delicious. The creamy texture and lemony flavor makes these a crowd favorite! Easy prep, easy cleanup and gone in a snap. My perfect ANYTIME bars!
Ingredients
- 1 cup plus 2 tablespoons all-purpose flour, divided
- 1/2 cup plus 2 tablespoons powdered sugar, divided
- 1/2 cup (1 stick) unsalted butter, melted
- 1/8 teaspoon kosher salt
- 2 eggs
- 1 cup granulated sugar
- 1/4 cup fresh lemon juice
- 1 lemon finely zested
Instructions
- Preheat the oven to 350°F. Prepare a 9x9-inch pan with baking spray, then line the pan with parchment paper (this will make it easier to remove the lemon bars in one piece so you can cut them properly on a cutting board).
- In a medium bowl, combine 1 cup flour, 1/2 cup powdered sugar, butter, and salt with a fork until a crumbly dough forms. Press the dough into the prepared pan so it covers the bottom and goes about 1/2 inch up the sides. Bake about 10 minutes or until it is a light golden brown.
- While the crust is baking, whisk together the remaining 2 tablespoons flour, eggs, sugar, lemon juice and fine lemon zest.
- Remove crust from oven, pour the lemon mixture over the crust.
- Bake 20-25 minutes, or until the center is set (doesn’t jiggle when you shake the pan). Allow lemon bars to cool for 30 minutes in pan. Using parchment, remove lemon bars and set on cutting board. Allow to cool completely or refrigerate until completely cooled.
- Cut into 16 squares. Sprinkle the remaining powdered sugar over the cooled lemon bars before serving.
DONNA'S NOTES
- Recipe perfectly doubles

Disclosure: Posts may contain affiliate links. If you purchase a product through an affiliate link your price will remain the same and will automatically receive a small commission. Thank you for supporting us, it helps us keep creating new recipes.
Sumber https://www.theslowroasteditalian.com")
")
")


