
Slow Cooker Mashed Sweet Potatoes
Slow Cooker Mashed Sweet Potatoes with Honey Butter are the ultimate mashed sweet potato recipe - just toss in a slow cooker and then whip for perfect, smooth, rich, and amazing sweet potatoes everyone loves! With directions to make it in the instant pot (pressure cooker) this is sure to be a favorite.
Hi! My name is Courtney from Sweet C's, and I am so excited to be here on ! Donna and Chad have built such an awesome community, and I'm thrilled to share some of my favorite recipes and videos here with you a couple times a month. I love sharing easy recipes anyone can make, delicious food finds, and also some of the awesome places I visit all over the world - all on a budget!
I've updated one of my favorite mashed sweet potato recipes to be even easier in a slow cooker - perfect for Thanksgiving, Christmas, or other busy holidays when oven and stove space are at a premium! I always make potatoes in a slow cooker now - I've started to use a super delicious slow cooker mashed potato recipe basically everytime I make mashed potatoes anymore, and decided my favorite sweet potato recipe needed to get the slow cooker treatment, too!

I'm also including oven baked and instant pot mashed sweet potato tips in case you prefer to not break out your slow cooker.
These potatoes have a slightly sweet, slightly spicy kick that are perfect for hearty dinners - and look stunning on a holiday table. Plus, you can't beat how incredibly simple they are!
I like to not only cook my potatoes in the compound honey butter that I make - but also save some to top the potatoes with. It's a lovely touch that makes the potatoes rich, indulgent, and perfectly crave-worthy!
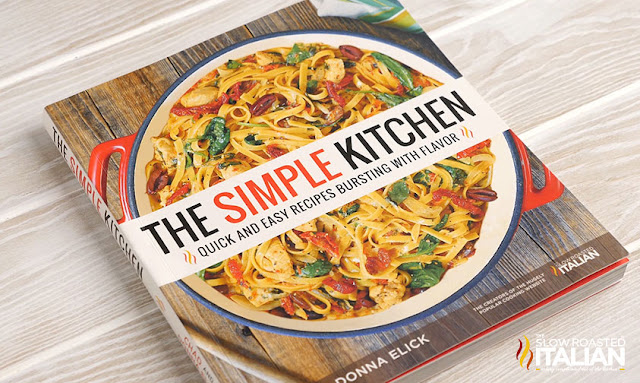
Speaking of simple recipes, of course our new cookbook {The Simple Kitchen - available to order now}is packed with delicious, easy recipes.
The Simple Kitchen is loaded with more than 75 BRAND NEW recipes and a hand full of family favorites too.
8 chapters with a total of 82 quick and easy recipes that are bursting with flavor!!!
Every recipe has a photo that will make your mouth water. It has slow cooker meals, one-pot recipes, quick dinners, simple appetizers, desserts and more!!!
And we have included kitchen tips to make dinnertime less stressful.
We are so excited to share our recipes with you!!! So, don't wait. Go and grab yours today! The Simple Kitchen <-- click here to order.

WHERE TO ORDER:
🔥 Amazon 🔥 Barnes & Noble 🔥 Books-a-Million 🔥 IndieBound
HELPFUL TIPS TO MAKE INSTANT POT MASHED SWEET POTATOES:
- Place sweet potatoes in a steamer basket with 1 cup of water.
- Stab potatoes to make steam vents.
- Close lid and seal, cook on high for 10 minutes.
- Do not force steam.
- When Instant Pot has lost pressure naturally, remove potatoes and remove peel, then continue to follow slow cooker recipe steps.
WHAT YOU WILL NEED TO MAKE SLOW COOKER MASHED POTATOES:
- Slow Cooker - the slow cooker is almost my most used kitchen gadget, especially during fall/winter! It's just so convenient, and lets face it, it makes comfort food taste even better!
- Hand held mixer -I have had mine for 10 years and it is still going strong.
Enjoy!
With love from our simple kitchen to yours.
Do you ❤ love ❤ TSRI? Don't miss another recipe. Click here to Subscribe to by Email and receive new recipes in your inbox every day!

Check out more of our favorite side dish recipes:
Boston Market Copycat Sweet Potato Casserole
Best Ever Slow Cooker Creamed Corn
The Best Stuffing Recipe Ever
Best Ever Slow Cooker Creamed Corn
The Best Stuffing Recipe Ever
Yield: 8

Slow Cooker Mashed Sweet Potatoes
Slow Cooker Mashed Sweet Potatoes with Honey Butter are the ultimate mashed sweet potato recipe - just toss in a slow cooker and then whip for perfect, smooth, rich, and amazing sweet potatoes everyone loves!
prep time: 10 minscook time: 4 hour and 20 minstotal time: 4 hours and 30 mins
Ingredients
- 4-5 large sweet potatoes
- 1 cup water
- 1 cup butter, softened
- 1/4 cup honey
- 2 tablespoons smoked paprika
- 2 tablespoons celtic sea salt
- 1 tablespoon fresh cracked pepper
- 1 tablespoon garlic powder
- 1 tablespoon red pepper flakes
- 1/2 cup chopped pecans or walnuts
Instructions
- Wash potatoes and stab each 4-6 times with a sharp knife to create steam vent holes.
- Add water to slow cooker cover and cook 4 hours, until potatoes are soft.
- In a small bowl, add butter , honey, and all herbs and spices (everything but the nuts), blend well to create compound butter. Cover with plastic wrap and leave in refrigerator.
- Remove potatoes and drain water. Wait until potatoes are cool enough to touch (but still very warm), and remove peels. They should slide right off when sweet potatoes are cooked. Add peeled sweet potatoes back to slow cooker.
- Add 1/2 compound butter mix to potatoes and using a handheld mixer, whip potatoes and butter until soft, fluffy, and creamy.
- Optional: Cook potatoes in slow cooker another 30 minutes to bring out the rich flavors from the compound butter even more!
- Mix nuts into potatoes, serve, and top with pats of compound butter for extra-indulgent sweet potatoes your guests will love!


Disclosure: Posts may contain affiliate links. If you purchase a product through an affiliate link your price will remain the same and will automatically receive a small commission. Thank you for supporting us, it helps us keep creating new recipes. Sumber https://www.theslowroasteditalian.com


")


