
No-Knead Roasted Garlic Skillet Bread + VIDEO
Easy Roasted Garlic No-Knead Skillet Bread is artisan style, bakery fresh bread at home with no special equipment or fussy kneading! Just mix, let rise, and bake for the most delicious bread you've ever made!
Baked bread is something that has always intimidated me - from rising, kneading, proofing, and all of the calculations that you need to work through to get perfect, bakery-style bread at home - it is just too much for the way I like to cook.
I love rustic, easy, and delicious recipes - ones that are adaptable to what you have on hand, can be changed up easily, and don't follow too many fussy rules. I have never been good with following rules!
This bread is super simple, great for a party, and can be prepped ahead of time if you're in a pinch when party planning. It's a great touch on a holiday table as an alternative to traditional rolls!

This easy roasted garlic bread bakes right in a heavy skillet, but is based off my Easy No Knead Bread recipe on Sweet C's - which is loaded with rosemary and other savory herbs! There is also a cheesy jalapeno no knead bread recipe that is one of my personal favorites, especially with sliced turkey or chicken for a spicy kick at lunch!
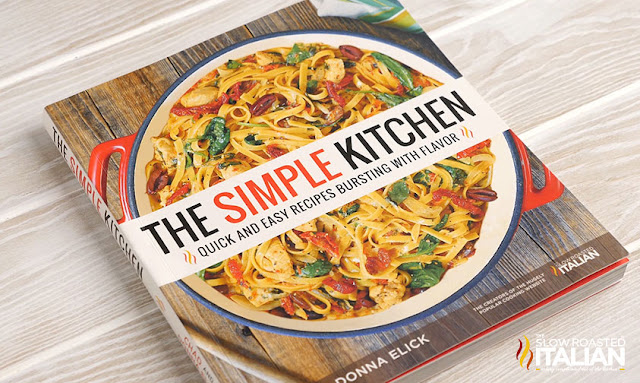
Speaking of simple recipes, of course our new cookbook {The Simple Kitchen - available to order now}is packed with delicious, easy recipes.
The Simple Kitchen is loaded with more than 75 BRAND NEW recipes and a hand full of family favorites too.
8 chapters with a total of 82 quick and easy recipes that are bursting with flavor!!!
Every recipe has a photo that will make your mouth water. It has slow cooker meals, one-pot recipes, quick dinners, simple appetizers, desserts and more!!!
And we have included kitchen tips to make dinnertime less stressful.
We are so excited to share our recipes with you!!! So, don't wait. Go and grab yours today! The Simple Kitchen <-- click here to order.

HELPFUL TIPS TO MAKE EASY ROASTED GARLIC NO-KNEAD SKILLET BREAD:
- Weigh your flour. While I do have the amount of flour listed in cups below if you don't have a kitchen scale, you will get absolutely perfect results with a scale. Flour's weight can vary wildly depending on so many different factors (altitude, brand, humidity in the air, bleaching, your measuring cups...) so I find it is best to weigh my ingredients.
- Let the dough rise fully. Don't rush your rise - that is what is getting us light, chewy, and delicious bread, without all the work! (Unless you're at altitude, in which case, see the section below.)
- Don't skip preheating the skillet! This helps the bread's crust crisp, and will help your bread rise quickly.
WHAT YOU WILL NEED TO MAKE EASY ROASTED GARLIC NO-KNEAD SKILLET BREAD:
- Active Dry Yeast - This is my favorite. It is really important to have a really good yeast and it should be fresh. I keep mine in the freezer in a mason jar for optimum freshness.
- Cast Iron Skillet - There are a ton of brands out there, but this is my trusty inexpensive go-to.
Enjoy!
With love from our simple kitchen to yours.
Do you ❤ love ❤ TSRI? Don't miss another recipe. Click here to Subscribe to by Email and receive new recipes in your inbox every day!

Check out more of our favorite bread recipes:
The Best Ever Challah BreadRed Lobster Copycat Cheddar Bay Biscuits
Copycat Texas Roadhouse Rolls
See how easy this No-Knead Roasted Garlic Skillet Bread is to make. Watch the video!!!
Yield: 8

Easy Roasted Garlic No Knead Skillet Bread
Easy Roasted Garlic No-Knead Skillet Bread is artisan style, bakery fresh bread at home with no special equipment or fussy kneading! Just mix, let rise, and bake for the most delicious bread you've ever made! Perfect for Thanksgiving!
Prep time: 3 hourCook time: 45 MTotal time: 3 H & 45 M
Ingredients
- 600 grams all-purpose flour (about 4 cups, lightly packed and leveled off)
- 2 cups (473.18mL) lukewarm water
- 1 1/2 tablespoons salt
- 1 envelope dry active yeast (7g, about 2¼ teaspoons)
- 1/4 cup lightly roasted garlic - whole or diced, depending on preference (pat dry if using jarred or deli-style pre roasted garlic)
- 1 tablespoon celtic sea salt (optional, but great sprinkled on top for extra crunch).
- 2 teaspoons Italian herb seasoning blend (rosemary, oregano, thyme), optional for topping
Instructions
- In a small bowl, add water and stir yeast packet in (make sure water is warm, but not too hot - if it is too cold or too hot it will not bloom properly).
- Let yeast bloom for about 5 minutes - it will have a light foam on it. In a large bowl, mix flour and salt with a spoon.Make a small well in the middle of the dry ingredients, and when yeast is proofed, slowly pour into flour.
- Mix by hand (either with your hands, or a spoon). The dough will turn begin to come together and pull away from the bowl.
- If the dough is too sticky, add more flour in small increments, about 1 tablespoon at a time. If the dough is too dry, add more water, 1 teaspoon at a time. (Be sure to reference high altitude directions for water above if you live over 4,000 feet.) Once the dough has come together, cover it and let it rise until it doubles in size (about 1.5 to 2 hours).
- Uncover the dough and give it a few pokes with your finger. If the dough has risen correctly, it should indent under the pressure of your fingers and slowly deflate.Add roasted garlic to dough, mix well.
- Gently scoop up the dough and make sure to remove it from the sides of the bowl (you want it to fully rise again, if it is still stuck to the sides of the bowl in parts, it won't). Place back in bowl, cover, and allow the dough to continue to rise for another 1.5-2 hours.
- Preheat oven to 450 degrees (230 degrees C, gas mark 8) and add skillet to it, (you want it to be incredibly hot). Punch down dough. Generously flour a sheet of parchment paper; transfer dough to parchment and, with floured hands, shape into a ball.
- Place dough on parchment paper and sprinkle top lightly with flour. Top with any extra herbs or a sprinkle of celtic sea salt. Top with a sheet of plastic wrap and let rest 30 minutes. Remove skillet from oven.
- Uncover dough and carefully transfer to skillet, with or without parchment paper beneath (if bottom of skillet is not coated with enamel, keep parchment paper beneath dough- I always use parchment paper because it is just the easiest and I never have to worry about anything sticking).
- Bake bread 45 minutes covered, then another 10 to 15 minutes uncovered until dough is baked through and golden brown on top. Cool slightly before slicing.
How To Make and Store Bread Dough For Cooking Later
- If you want to make this bread for a party, a big dinner, or to have on hand without all of the prep work, you can pre-make the dough and save it in the refrigerator or freezer until you need it!
- To have the best bread from pre-prepped dough, I like to make the bread all the way through the first rise.
- When you would ready your bread for a second rise, tightly wrap the dough ball in plastic wrap (take care to get rid of any extra air bubbles), and place into a fridge immediately if you will be baking the bread in the next 2 days.
- If freezing, wrap the dough tightly in plastic wrap (be extra sure to have a tight seal on the dough for the freezer - air pockets could cause freezer burn), and then pop that plastic wrap into a gallon sized plastic bag. I like to have it in plastic wrap inside a plastic bag because it helps stave off ice crystals even more - just like how placing ice cream container into a gallon sized plastic bag helps prevent ice crystals from forming, and makes it easily scoop-able!
- When it is time to make your bread, remove from fridge or freezer, and place on a lightly floured sheet of parchment paper in a warm, dry place. Let dough come to temperature, and fully rise a second time (rise should be 1.5 - 2 hours, defrosting time will be anywhere from 1 hour - 3 hours, depending on numerous factors).
- After the secondary rise, complete final dough resting period and baking instructions as listed in recipe below.
High Altitude No Knead Bread Adjustments
- Since I live in Colorado, I am aware of the effect altitude has on my baking. While there are a lot of complicated answers to the how to cook bread at high altitude question, this bread is pretty easy to get right, from sea level to the mountains.
- Add extra water. Add teaspoons full of water, 1 at a time, and mix into dough until it is slightly sticky to the touch (could be up to two tablespoons, but to prevent needing to add more flour, add teaspoons one by one.)
- Reduce the rising time. Let the bread rise fully (1.5-2 hours for the first rise), and then only 1 hour for the second rise. If you are at very high altitude, you can skip the final resting period as well, and pop the bread into the oven after the second rise.
- In the video for this recipe, you will notice my hands are slightly sticky from the dough - that is because I live at 5,000+ feet, and have found it works the best!


Disclosure: Posts may contain affiliate links. If you purchase a product through an affiliate link your price will remain the same and will automatically receive a small commission. Thank you for supporting us, it helps us keep creating new recipes.
Sumber https://www.theslowroasteditalian.com


