Showing posts sorted by relevance for query kitchen-hack-homemade-whipped-cream. Sort by date Show all posts

Kitchen Hack: Homemade Whipped Cream

Homemade Whipped Cream is rich, silky and utterly delicious. It's the perfect topping to just about every dessert. It is really a kitchen staple. This simple recipe with 11 custom flavor creations and tips on how to keep it longer in the fridge, you are sure to find what you are looking for!

s the perfect topping to just about every dessert Kitchen Hack: Homemade Whipped Cream

Perfect for topping fruit, coffee, making frosting and so much more.

I can only recall a few times growing up that we bought premade whipped cream. It was always homemade, and I absolutely love the taste and texture of homemade whipped cream.

The one issue that I used to struggle with was after sitting for a while the whipped cream would deflate. Well, I figured out the trick to stabilize it and help it stay fluffy for days in the fridge.

Custom Flavors - Add powders at the same time that you add the sugar. Add liquids once the cream is thick enough to see a trail follow the beater. All flavors are to taste, add more if it is not strong enough.

Chocolate Whipped Cream - Add 2 tablespoons cocoa powder.

Vanilla Almond Whipped Cream (my favorite) - Add 1 teaspoon vanilla extract and 1 teaspoon almond extract.

Vanilla Bean Whipped Cream - Add 1 tablespoon vanilla bean paste. Chocolate Whipped Cream - Add 2 tablespoons unsweetened cocoa powder at the time you add the sugar.

Hot Chocolate Whipped Cream - Add 2 tablespoons unprepared hot chocolate mix.

Peppermint Whipped Cream - Add 1 teaspoon peppermint extract and 7-10 drops red food coloring.

Strawberry Whipped Cream - Add 1 tablespoon strawberry jam (at the time you add liquids).

Lemon Fluff Whipped Cream - Add 1 teaspoons lemon extract and 1/2 tablespoon lemon zest.

Peanut Butter Whipped Cream - Add 1 tablespoon creamy peanut butter.

Pumpkin Spice Whipped Cream - Add 1 teaspoon cinnamon, and 1/4 teaspoon nutmeg, 1/4 teaspoon ginger.

Praline Whipped Cream - Add 2 tablespoons crushed praline topping folded into the stiff-peaked whipped cream.

Marshmallow Whipped Cream - Add 2-3 tablespoons of marshmallow fluff once soft peaks form. Continue whipping until cream reaches medium or firm peaks. This is a stabilized whip cream.

Stabilizing whipped cream with dry pudding mix - Add 2 tablespoons dry instant pudding mix. I love flavoring this way too. I prefer Jell-O Instant French Vanilla pudding. It helps the whipped cream stay fluffy longer.


Enjoy!

With love from our simple kitchen to yours. 

Do you   love  TSRI?  Don't miss another recipe.  Click here to Subscribe to by Email and receive new recipes in your inbox every day!


Don't miss a thing! Follow us on Facebook Twitter Pinterest | Instagram ❤ ❤ ❤ 

s the perfect topping to just about every dessert Kitchen Hack: Homemade Whipped Cream


Yield: 2 Cups

Homemade Whipped Cream

Homemade Whipped Cream is rich, silky and utterly delicious. It's the perfect topping to just about every dessert. It is really a kitchen staple. This simple recipe with 11 custom flavor creations and tips on how to keep it longer in the fridge, you are sure to find what you are looking for!

Ingredients

  • 3-4 tablespoons powdered sugar
  • 1 cup heavy cream, cold 
  • pinch of salt 

Instructions

  1. Add sugar and salt to a tall bowl. I use my 8-cup measuring cup. Pour cream into the bowl. Whip with an electric mixer (or stand mixer), with the whisk attachment. Beat mixture, beginning on low speed and increasing slowly to prevent any cream from splashing. 
  2. Increase speed as much as you can without splashing out of the bowl. As the cream is whipped, you will start to notice a trail from the mixer through the cream. If I am adding any extracts, I like to add them at this point. 
    Continue to beat, lower the speed as it thickens. Once you have soft peaks (when you lift the mixer out of the whipped cream, some cream stays on the whisk and barely holds it shape). If you want less fluffy whipped cream, reduce speed to low so you can watch the stages carefully. Otherwise, you may go too far too fast and end up with butter.
  3. For medium peaks continue beating until the cream is firm enough to hold its shape, but the tip flops over. If you are looking for whipped cream thick enough to pipe, you will want to go to firm peaks. At this stage, when you lift the beaters out of the whipped cream the cream will hold its shape and stand up on the end of the beater when flipped upside down. 
  4. Serve and enjoy!

DONNA'S NOTES

  1. If you are adding powders, they should be added at the time the sugar and salt are added to the bowl. 
  2. When adding liquids, I like to add them once the cream is thick enough to see a trail as the mixer moves around.


s the perfect topping to just about every dessert Kitchen Hack: Homemade Whipped Cream 

Disclosure: Posts may contain affiliate links. If you purchase a product through an affiliate link your price will remain the same and will automatically receive a small commission. Thank you for supporting us, it helps us keep creating new recipes.

Sumber https://www.theslowroasteditalian.com

Pumpkin Slab Pie

Pumpkin Slab Pie is the perfect fall dessert for a crowd! Creamy pumpkin pie on top of a buttery homemade crust, top it with whipped cream or serve a la mode!
 is the perfect fall dessert for a crowd Pumpkin Slab Pie
Pumpkin Pie is the ultimate Thanksgiving dessert. With Thanksgiving less than a month a way its time to start planning out our menu and I know this pumpkin slab pie is going on mine! If you're having a crowd for Thanksgiving dinner, this is perfect because now you don't have to make multiple pies!


Hi everyone, its Aimee from Like Mother, Like Daughter here! I am so excited to be joining team as a monthly contributor. Keep your eye out for my new recipes every month, you can expect to see lots of heartwarming recipes, and lots of rich desserts, because I have the biggest sweet tooth ever!


Make sure that you don't overfill the pie with filling. I know you'll want to use every last drop of that delicious pumpkin pie filling, but if you fill it too high you risk the filling spilling as you carry the pan to the oven or overflowing around the crust. Depending on how deep your pan is, you might not need to use all of the filling - it spreads a teeny bit as it's baked.

 is the perfect fall dessert for a crowd Pumpkin Slab Pie

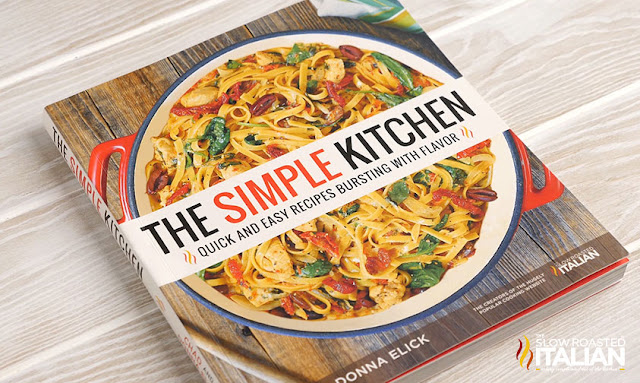
Speaking of simple recipes, of course our new cookbook {The Simple Kitchen - available to order now}is packed with delicious, easy recipes.

The Simple Kitchen is loaded with more than 75 BRAND NEW recipes and a hand full of family favorites too.

8 chapters with a total of 82 quick and easy recipes that are bursting with flavor!!!

Every recipe has a photo that will make your mouth water. It has slow cooker meals, one-pot recipes, quick dinners, simple appetizers, desserts and more!!!

And we have included kitchen tips to make dinnertime less stressful.

We are so excited to share our recipes with you!!! So, don't wait. Go and grab yours today!  The Simple Kitchen <-- click here to order. 

 is the perfect fall dessert for a crowd Pumpkin Slab Pie

Helpful Tips to make Pumpkin Slab Pie:


What you will need to make Pumpkin Slab Pie:


Enjoy!

With love from our simple kitchen to yours. 

Do you   love  TSRI?  Don't miss another recipe.  Click here to Subscribe to by Email and receive new recipes in your inbox every day!

Don't miss a thing! Follow us on Facebook Twitter Pinterest | Instagram ❤ ❤   


Thanksgiving, dessert
Yield: 24
Author:

 is the perfect fall dessert for a crowd Pumpkin Slab Pie

Pumpkin Slab Pie

Pumpkin Slab Pie is the perfect fall dessert for a crowd! Creamy pumpkin pie on top of a buttery homemade crust, top it with whipped cream or serve a la mode!

Ingredients

For the Pie Crust
  • 4 cups all-purpose flour
  • 1 tsp salt
  • 1 tsp sugar
  • 1 1/2 cups + 2 TBS (3 sticks + 2 TBS) cold butter, cubed
  • 3/4 cup ice water
For the Pumpkin Pie Filling
  • 1 29 oz can (or 2-15 oz cans) pumpkin puree (not pumpkin pie filling)
  • 2 cups evaporated milk
  • 1 1/2 cups brown sugar
  • 1/2 cup sugar
  • 2 tsp cinnamon
  • 1/2 tsp nutmeg
  • 1/4 tsp ginger
  • 1/4 tsp cloves
  • 1 tsp salt
  • 4 eggs
For the Egg Wash
  • 1 egg
  • 1 TBS water or milk

Instructions

How to cook Pumpkin Slab Pie

To Make the Pumpkin Pie Crust
  1. Mix the flour, salt and sugar in a large bowl. Add in the butter pieces. Using a pastry cutter (or two forks - though its much harder), cut the butter into the mixture until it resembles coarse crumbs, with some pea sized pieces.
  2. Drizzle the cold water in about 1 tablespoon at a time and stir with a rubber spatula. Continue kneading the dough together with your holds until the flour and butter are fully incorporated together into a nice dough. It shouldn't be too sticky.
  3. Separate about 1/4 of the dough (this will be for the top decorative leaves if you want them. Flatten each section into 1 inch thick discs. Wrap in plastic wrap and place in the fridge for about 2 hours.
To Make the Pumpkin Pie Filling
  1. In a large bowl combine your pumpkin puree, evaporated milk, brown sugar, sugar, cinnamon, nutmeg, ginger, cloves, salt and eggs. Stir until mixed. Cover the bowl and place in the fridge till needed.
To Make the Pumpkin Slab Pie
  1. Remove the larger piece of pie crust from the fridge. Roll that out evenly into an approximately 18x13 rectangle. Place the pie crust into a greased 10x15 jelly roll pan (it should be about 1inch thick so you can fit more of the filling) Smooth the crust so it fits into the corners and crimp the edges with your fingers.
  2. Pour the pumpkin pie filling into the crust. Carefully place the pie in the oven to bake, make sure not to spill any of the filling. Bake for 35-45 minutes until the middle is barely jiggly.
  3. Remove from oven and allow to cool on a wire rack completely.
  4. Roll out the second disc of pie crust to be about 1/8 inch thick. Using leaf or pumpkin shaped cookie cuters, cut into the shapes. Cut veins with a sharp knife if desired. Brush each with egg wash (beat egg and water together in a small bowl). Place on a baking sheet and bake for about 10 minutes or until lightly browned. Remove and place on pie when serving.
  5. Serve pie with fresh whipped cream.
  6. Cover any leftovers and store in the fridge for 5-6 days.


Disclosure: Posts may contain affiliate links. If you purchase a product through an affiliate link your price will remain the same and will automatically receive a small commission. Thank you for supporting us, it helps us keep creating new recipes.

Sumber https://www.theslowroasteditalian.com